hand lettering pdf free download

Welcome to the world of hand lettering, a creative art form that combines unique styles and techniques. Discover free downloadable PDFs to kickstart your lettering journey with ease and inspiration.

What is Hand Lettering?

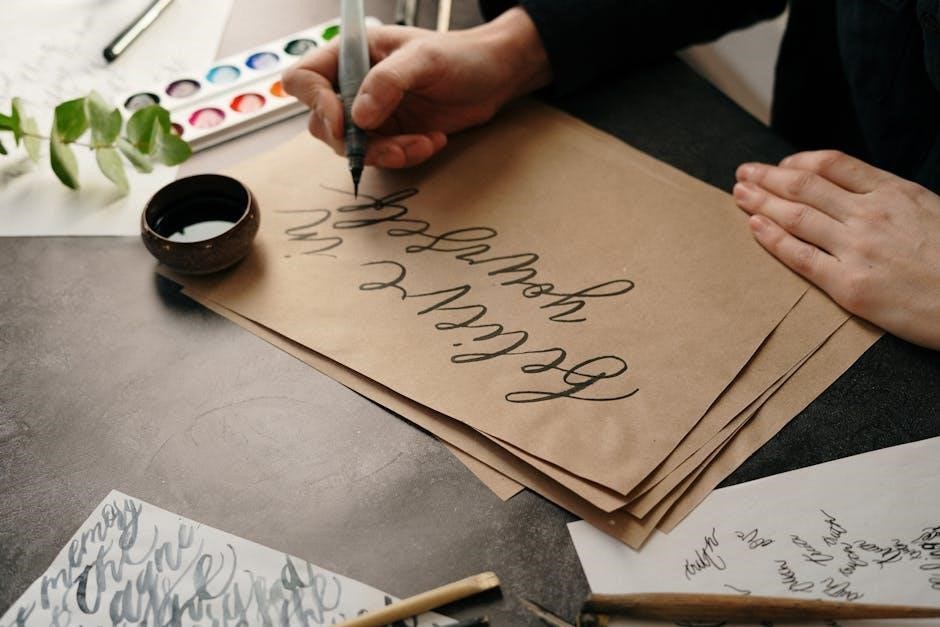
Hand lettering is the artistic process of creating decorative and stylized letters by hand. Unlike calligraphy, which focuses on writing with specific tools, hand lettering emphasizes unique designs and personal flair. It blends creativity with technical skill, allowing artists to craft visually appealing text for various purposes. From bold brush strokes to delicate script styles, hand lettering offers endless possibilities for self-expression. Many artists share free downloadable PDFs, offering practice sheets and guides to help enthusiasts master this craft. Whether for personal projects or professional designs, hand lettering adds a distinctive, human touch to any creation, making it a popular and versatile art form.

Benefits of Practicing Hand Lettering

Practicing hand lettering fosters creativity and personal style, allowing artists to express themselves uniquely. It enhances fine motor skills and hand-eye coordination while providing a therapeutic outlet for relaxation. Regular practice improves focus and patience, as creating intricate lettering requires dedication. Additionally, hand lettering boosts confidence and opens opportunities for artistic growth. It is versatile, applicable to various projects like designing quotes, creating personalized gifts, or enhancing planners. Many free downloadable PDFs offer practice sheets, making it accessible for everyone to refine their skills and explore this rewarding art form, whether for personal enjoyment or professional endeavors.

A Brief History of Hand Lettering

Hand lettering traces its roots to ancient civilizations, evolving through various artistic and cultural movements. It gained prominence in the 19th century with Spencerian script, a foundational style for modern lettering. Educational textbooks, like Frank T. Daniels’ “A Text-Book of Free-Hand Lettering,” played a crucial role in preserving and teaching these techniques. Over time, hand lettering transitioned from traditional tools to digital mediums, blending classic methods with modern technology. Today, free downloadable PDFs make it easier than ever to explore historical styles and practice timeless techniques, ensuring the art form remains vibrant and accessible for future generations.

Types of Hand Lettering Styles

Hand lettering encompasses various styles, including Brush Lettering, Modern Calligraphy, and Vintage-Style Lettering. Each offers unique techniques, making them popular for artistic expression and practice through free downloadable PDFs.

Brush Lettering

Brush lettering is a popular and rewarding style that mimics the fluid strokes of traditional brush calligraphy. Known for its dynamic texture, it adds a personal touch to designs. With free downloadable PDFs, beginners can practice basic strokes and alphabet drills, gradually mastering this art form. Many resources offer specific sheets for Brush Lettering, such as the “25 Brush Lettering Practice Sheets” and “Dual Brush Pen Lettering Worksheets.” These guides help refine letterforms and spacing, making it easier to create beautiful, professional-looking scripts. Brush lettering is perfect for those who enjoy experimenting with varying line widths and artistic expression.

Modern Calligraphy

Modern calligraphy blends traditional techniques with contemporary flair, offering a versatile and artistic way to enhance lettering. Free downloadable PDFs provide ample practice materials, such as alphabet guides and stroke exercises, to master this elegant style. Resources like “Modern Calligraphy Practice Sheets” and “Hand Lettering Guides” are perfect for refining letterforms and spacing. Many worksheets cater to both beginners and advanced artists, allowing for experimentation with creative lettering styles. Modern calligraphy is ideal for crafting beautiful quotes, wedding invitations, and artistic projects, making it a popular choice for those who enjoy expressive and personalized designs.

Vintage-Style Lettering

Vintage-style lettering evokes nostalgia and elegance, drawing inspiration from historical fonts and ornate designs. Free downloadable PDFs offer a wide range of vintage-inspired practice sheets, perfect for mastering classic letterforms. These resources often feature intricate flourishes, serif fonts, and distressed textures, ideal for creating retro-themed projects. Vintage-style lettering is popular for designing posters, logos, and invitations, as it adds a timeless charm to any artwork. Beginners can start with basic vintage alphabets, while advanced artists can experiment with layering and shading techniques. These PDFs provide a great way to refine your skills and achieve a classic, sophisticated look in your lettering projects.

Popular Free Hand Lettering PDFs

Enhance your skills with popular free hand lettering PDFs. Discover 25 brush lettering practice sheets, 40 versatile worksheets, and beginner-friendly calligraphy guides. Perfect for all skill levels!

25 Brush Lettering Practice Sheets

Perfect for beginners, these 25 free brush lettering practice sheets offer a variety of styles and exercises. Designed to help you master the basics of brush lettering, these sheets include uppercase and lowercase letters, numbers, and symbols. With guided strokes and tracing templates, you can refine your technique and build confidence. Ideal for use with brush pens or digital tools, they cater to both traditional and modern approaches. Print them out or use them digitally on your iPad for a seamless practice experience. These sheets are a great way to improve your lettering skills while exploring your creativity.

40 Free Hand Lettering Worksheets

Enhance your hand lettering skills with these 40 free worksheets, offering a diverse range of script fonts and styles. Perfect for both digital and traditional practice, they can be printed for use with brush pens or downloaded for iPad lettering. These sheets cover uppercase and lowercase letters, numbers, and symbols, providing a comprehensive foundation for mastering hand lettering. Whether you’re a beginner or looking to refine your technique, these worksheets are designed to help you progress smoothly. Explore various styles and creative possibilities while improving your lettering abilities with these versatile and accessible practice tools.

Calligraphy Worksheets for Beginners

Perfect for those new to calligraphy, these worksheets provide a gentle introduction to foundational strokes, letterforms, and basic techniques. Designed to be user-friendly, they include guided lines and practice areas for uppercase and lowercase letters. Available as free PDF downloads, these sheets can be printed or used digitally with iPads. They offer a gradual learning curve, starting with simple strokes and progressing to more complex lettering. Ideal for brush pens or dip pens, these worksheets are a great way to build confidence and skill in calligraphy. Their clear layout and step-by-step approach make them perfect for practicing consistently and effectively.

Where to Download Free Hand Lettering PDFs

Popular websites like Creative Market and The Spruce Crafts offer free hand lettering PDFs. Search for specific styles or tools to find the best resources for practice;

Websites Offering Free Downloads

Websites Offering Free Downloads

Several websites provide free hand lettering PDFs for download. Creative Market and The Spruce Crafts are popular destinations, offering a variety of styles and practice sheets. Additionally, sites like Kelly Leigh Creates and Tombow feature downloadable worksheets tailored for brush pens and calligraphy. These resources often include alphabet guides, basic strokes, and themed templates. Some platforms also offer digital versions compatible with iPads for Procreate practice. When searching, use keywords like “free hand lettering PDF” or “brush lettering worksheets” to find relevant downloads. These websites are great for both beginners and experienced artists looking to refine their skills.

How to Access Free Practice Sheets

To access free hand lettering practice sheets, visit websites like Creative Market, Kelly Leigh Creates, or Tombow. Use search terms such as “free hand lettering PDF” or “brush lettering worksheets” to find resources. Many sites offer direct downloads, while others may require signing up for newsletters or creating accounts. Once downloaded, print the sheets or use them digitally with tools like Procreate. These practice sheets often include basic strokes, alphabet guides, and themed templates, perfect for improving your lettering skills. Explore various styles and formats to suit your creative needs and preferences.

Top Resources for Hand Lettering PDFs

Discover the best resources for free hand lettering PDFs, including websites like Creative Market, Kelly Leigh Creates, and Tombow. These platforms offer a variety of practice sheets, from basic strokes to intricate designs. Additionally, iStock and Procreate provide unique templates for digital practice. Many artists share their free PDFs on personal blogs, such as Dawn Nicole Designs, making it easy to explore different styles. Whether you’re a beginner or an advanced artist, these resources cater to all skill levels, ensuring you find the perfect tools to enhance your hand lettering skills and creativity.

Tools Needed for Hand Lettering

Essential tools include brush pens like Tombow, digital software such as Procreate, and high-quality paper for smooth lettering. iPads and styluses are also popular for modern practices.

Best Brush Pens for Practice

For hand lettering, the best brush pens include Tombow Dual Tip, Faber-Castell Pitt Artist, and Kuretake Zig Clean Color. These pens offer flexible tips for varying line widths and vibrant ink flow, ideal for practicing basic strokes and intricate lettering styles. Tombow pens are especially popular for their water-based ink and blendable colors, making them perfect for modern calligraphy and brush lettering techniques. They are widely recommended in free hand lettering PDFs and worksheets, ensuring smooth and expressive practice sessions. Pairing these pens with high-quality paper enhances the lettering experience, allowing for precise control and beautiful results.

Digital Tools for Hand Lettering

Digital tools like Procreate and Adobe Illustrator revolutionize hand lettering, offering precise control and endless creative possibilities. Procreate’s brush library and layering features make it ideal for iPad users, while Illustrator’s vector capabilities allow for scalable designs. The iPad Pro, paired with an Apple Pencil, provides a natural drawing experience. Free downloadable brushes and fonts from platforms like Creative Market enhance your workflow. These tools are perfect for practicing lettering digitally, experimenting with styles, and creating professional-quality artwork. Whether you’re a beginner or advanced artist, digital tools offer flexibility and convenience to refine your hand lettering skills effectively.

Paper and Printing Tips

Choosing the right paper and printer settings is essential for hand lettering practice. Opt for high-quality, smooth paper (80-100 gsm) to ensure vibrant ink flow and minimal bleed. Laser printers produce crisp lines, while inkjet printers offer vibrant colors. Adjust settings to high resolution for clear guidelines. For digital practice, print PDFs on bright white paper to enhance visibility. Consider using a light pad for tracing or grid paper to improve alignment. Pair your preferred paper with compatible pens for optimal results. Proper printing ensures your hand lettering PDFs are sharp and ready for practice, helping you refine your skills effectively.

How to Use Hand Lettering PDFs

Print or download free hand lettering PDFs for practice, trace letters, or use digitally on iPads. These versatile tools enhance both traditional and modern lettering techniques effectively.

Printing and Tracing

Printing hand lettering PDFs allows you to practice on physical sheets, making it easier to master strokes and letterforms. Use high-quality paper for smooth pen glides.

Tracing over printed guides helps build muscle memory and accuracy. Start with basic strokes, then progress to full letters. This method is ideal for beginners refining their skills.

For best results, use brush pens or markers to replicate the feel of hand lettering. Compare your traced letters with the guides to identify areas for improvement and track progress over time.

Digital Practice on iPads

Digital tools like iPads offer a versatile way to practice hand lettering using free PDFs. Download and import lettering guides into apps like Procreate or GoodNotes for a seamless experience.

Use the Apple Pencil to trace and practice strokes directly on the screen. Undo mistakes easily and experiment with different styles without wasting paper or ink.

Many free PDFs are optimized for digital use, allowing you to layer guides over blank sheets for practice. This method is perfect for refining techniques and exploring creative possibilities.

Combine digital practice with traditional tools for a hybrid approach. Sync your progress across devices to continue learning wherever you go, making hand lettering accessible anytime, anywhere.

Combining with Other Art Supplies

Enhance your hand lettering practice by incorporating other art supplies for unique effects. Use watercolor paints or colored pencils to add vibrant colors and details to your lettering.

  • Combine lettering with collage elements for textured designs.
  • Layer stickers or washi tape for decorative accents.
  • Experiment with mixed media techniques to create visually appealing designs.

Digital tools like Procreate also allow blending of lettering with other art elements. This approach fosters creativity and makes your artwork stand out. Try these combinations to personalize your projects and explore endless artistic possibilities;

Practice Tips for Improving Hand Lettering

Consistent practice is key to mastering hand lettering. Start with basic strokes and drills, then progress to alphabet practice sheets. Use guides to refine letterforms and spacing for better consistency.

Focus on muscle memory by repeating strokes and letters regularly. Experiment with different tools and styles to enhance your skills and creativity in hand lettering;

Basic Strokes and Drills

Mastering basic strokes is the foundation of hand lettering. Start with simple vertical and horizontal lines to build consistency and control. Circle drills and figure-eight exercises improve fluidity. Use free PDF guides to practice foundational shapes, such as underturns and overturns, which form the basis of letterforms. Regular drills help develop muscle memory, ensuring smooth transitions between strokes. Focus on maintaining even spacing and pressure to achieve balanced lettering. Download practice sheets that include stroke exercises and lettering drills to refine your technique. Consistent practice will enhance your ability to create precise and elegant hand-lettered designs.

Alphabet Practice Sheets

Alphabet practice sheets are essential for mastering letterforms in hand lettering. Download free PDFs featuring uppercase and lowercase letters, numbers, and symbols. These sheets guide you through consistent lettering, helping you refine spacing and alignment. Practice sheets often include numbered guides and stroke indicators for accuracy. Use them with brush pens or digitally on iPads. Perfect for all skill levels, they cover various styles, from modern calligraphy to vintage lettering. Regular practice with these sheets enhances muscle memory and improves lettering consistency. Access free downloads to focus on specific alphabets and elevate your hand lettering skills with ease and precision.

Advanced Techniques

Advanced techniques in hand lettering involve mastering intricate flourishes, varying letter heights, and experimenting with letter connections. Free PDF guides offer detailed tutorials on creating elaborate scripts and decorative styles. Practice sheets often include complex compositions, such as quote layouts and decorative borders. These resources help refine spacing, alignment, and artistic expression. Downloadable worksheets focus on advanced strokes, shading, and texture integration. They provide step-by-step instructions for achieving professional-level lettering. Regular practice with these PDFs enhances creativity and precision, allowing artists to explore unique styles and push their lettering skills to new heights. Elevate your craft with these comprehensive advanced technique guides.

Creative Projects Using Hand Lettering

Transform your hand lettering skills into stunning projects like personalized gifts, planners, posters, and quotes. Free PDFs offer guidance for designing and printing unique wall art and journals.

Designing Quotes and Posters

Hand lettering adds a personal touch to quotes and posters, making them visually striking. Use free downloadable PDFs to practice lettering styles that inspire creativity. Start by selecting meaningful quotes, then experiment with typography and layouts using brush pens or digital tools. For posters, combine bold lettering with vibrant colors or minimalist designs for contrast. Many free PDF guides offer templates and tips to help you perfect your designs. Whether for personal projects or gifts, hand-lettered quotes and posters bring artistry to any space. Experiment with styles to create unique, eye-catching pieces that reflect your personality.

Creating Personalized Gifts

Hand lettering is a thoughtful way to create personalized gifts, such as custom cards, mugs, or journals. Use free downloadable PDFs to design beautiful, one-of-a-kind presents. Start by selecting a meaningful quote or the recipient’s name, then practice lettering styles using guides from free PDFs. Combine your lettering with artistic elements like flourishes or flowers for a unique touch. Many PDFs include templates for holidays, birthdays, or special occasions, making it easy to craft heartfelt gifts. With practice, your personalized creations will stand out as thoughtful and memorable, perfect for loved ones.

Hand Lettering for Planners

Hand lettering adds a personal touch to planners, making them more visually appealing and organized. Free downloadable PDFs offer lettering guides, templates, and drills specifically designed for planner use. These resources help create neat, readable fonts and decorative styles perfect for section headers, to-do lists, or inspirational quotes. Many PDFs include layouts for weekly spreads, monthly overviews, and goal setting pages. By practicing with these tools, you can elevate your planner’s aesthetic and functionality. Combine lettering with stickers or stamps for a unique look, turning your planner into a creative and functional space that reflects your personality.

Additional Resources

Explore books, online communities, and workshops for deeper learning and connecting with fellow enthusiasts. These resources provide guidance, inspiration, and support for mastering hand lettering techniques and styles.

Books on Hand Lettering

Books are essential resources for mastering hand lettering, offering in-depth guides and inspiration. Titles like The Complete Photo Guide to Hand Lettering and Calligraphy provide comprehensive tutorials and techniques for beginners and experts. Another notable book, A TEXT-BOOK OF FREE-HAND LETTERING by Frank T. Daniels, focuses on practical lettering skills. These books often include practice exercises, historical insights, and tips for refining your craft. They are perfect for those seeking structured learning and creative inspiration, complementing the free downloadable PDFs available online.

Online Communities and Forums

Joining online communities and forums is a great way to connect with fellow hand lettering enthusiasts. Platforms like Facebook groups, Reddit, and specialized forums offer spaces to share work, get feedback, and learn from others. Many communities share free hand lettering PDFs, brushes, and tips. These groups often host challenges and workshops, helping you stay motivated and improve your skills. Engaging with these communities provides inspiration, support, and access to exclusive resources, making them invaluable for anyone passionate about hand lettering.

Workshops and Tutorials

Workshops and tutorials are excellent resources for mastering hand lettering. Many websites offer free and paid workshops, providing step-by-step guidance for beginners and advanced learners. These sessions often include downloadable PDFs with practice sheets and guides. Online platforms like Skillshare, Creative Market, and YouTube channels host tutorials that cover various lettering styles. Workshops may also include live sessions, Q&A, and feedback from instructors. These resources help you refine your techniques, explore new styles, and stay inspired. Whether you prefer structured classes or self-paced learning, workshops and tutorials are a great way to enhance your hand lettering skills and creativity.

Hand lettering is a rewarding art form, made accessible with free downloadable PDFs. These resources offer inspiration and practical tools for every skill level, fostering creativity and growth.

Final Thoughts on Hand Lettering

Hand lettering is a timeless art that offers endless creative possibilities. With free downloadable PDFs, anyone can access practice sheets and guides to refine their skills. These resources provide a foundation for mastering various styles, from brush lettering to modern calligraphy. Whether you’re a beginner or an experienced artist, hand lettering PDFs are invaluable tools for growth. They allow you to explore different techniques, experiment with new tools, and bring your ideas to life. Embrace the journey, stay inspired, and enjoy the fulfilling process of creating beautiful lettering. Your artistic expression awaits!

Encouragement to Keep Practicing

Consistency is key to mastering hand lettering, and with free downloadable PDFs, you have endless resources to refine your skills. Celebrate small progress, as every stroke brings you closer to artistic excellence. Don’t be afraid to experiment and make mistakes—they’re part of the learning process. The joy of hand lettering lies in its versatility and creative expression. Whether you’re crafting quotes, designing posters, or personalizing gifts, remember that practice fuels passion. Stay motivated, embrace your unique style, and keep exploring the beautiful world of lettering with the help of these free tools. Happy creating!

Posted in PDF

tuckman model pdf

The Tuckman Model, introduced by Bruce Tuckman in 1965, outlines the stages of team development, providing insights into how groups evolve and improve over time.

Overview of the Tuckman Model

The Tuckman Model, developed by Bruce Tuckman in 1965, is a widely recognized framework that describes the five stages of team development: Forming, Storming, Norming, Performing, and Adjourning. This model provides a structured approach to understanding how groups progress from initial formation to high performance. It emphasizes the importance of each stage in building trust, resolving conflicts, and enhancing collaboration. The model is particularly useful for leaders and educators to guide teams through challenges and foster growth. Its simplicity and practicality have made it a cornerstone in team management and development strategies across various industries.

History and Development of the Model

Bruce Tuckman introduced his team development model in 1965, initially outlining four stages: Forming, Storming, Norming, and Performing. In 1977, he added the fifth stage, Adjourning, completing the framework. Tuckman’s research, published in Psychological Bulletin, laid the foundation for understanding group dynamics. His work built on earlier theories but provided a clear, structured approach. The model has since been widely adopted in education, business, and psychology, becoming a cornerstone for team leadership and development. Its evolution reflects Tuckman’s commitment to refining his theory based on ongoing research and practical applications.

Key Concepts and Principles

The Tuckman Model emphasizes that teams progress through distinct stages to achieve maturity and effectiveness. It highlights the importance of leadership, communication, and trust in fostering collaboration. Each stage addresses specific challenges, such as conflict resolution and role clarification, which are essential for building a cohesive unit. The model underscores the need for adaptability and patience, as teams require time to develop and perform optimally. By understanding these principles, leaders can guide their teams more effectively, ensuring a smooth transition through the stages and enhancing overall productivity and success.

Stage 1: Forming

Stage 1: Forming is the initial phase where team members meet, establish goals, and define roles, marked by uncertainty and excitement as they begin collaboration.

Characteristics of the Forming Stage

The Forming Stage is marked by uncertainty and excitement as team members meet for the first time. Individuals are polite and cautious, focusing on understanding their roles and the team’s purpose. There is a reliance on the leader for direction, as members explore boundaries and establish relationships. The atmosphere is often characterized by orientation and initial bonding, with a focus on setting the foundation for future collaboration. This stage is essential for building trust and aligning expectations, though productivity is typically low as the team navigates its early dynamics.

Challenges in the Forming Stage

The Forming Stage presents unique challenges, including uncertainty and ambiguity about roles and responsibilities. Team members may feel hesitant to express opinions or take initiative, leading to tentative interactions. There is often a lack of clear direction, as the team relies heavily on the leader for guidance. Additionally, individuals may be unclear about the team’s goals and how their contributions fit into the larger picture. This stage can also see initial conflicts as personalities and work styles begin to emerge, requiring strong leadership to navigate these challenges and foster collaboration. The team’s productivity is typically low during this period of exploration and adjustment.

Strategies for Effective Team Formation

Effective team formation requires strategic approaches to overcome initial challenges. Clear communication of goals, roles, and expectations is essential to reduce ambiguity. Leaders should encourage open dialogue, fostering a safe environment for team members to express ideas and concerns. Active listening and empathy can help build trust and facilitate collaboration. Establishing a shared vision and providing guidance while allowing autonomy can empower individuals. Team-building activities and icebreakers can also help members connect on a personal level, enhancing cohesion. Strong leadership and a supportive culture are critical during this phase to set the foundation for future success and minimize potential conflicts.

Stage 2: Storming

The Storming stage is marked by conflict and competition as team members challenge ideas and personalities, leading to resistance and power struggles within the group.

Characteristics of the Storming Stage

The Storming stage is characterized by conflict, competition, and resistance among team members. Individuals challenge ideas, roles, and authority, leading to power struggles and emotional tension. Communication may become strained as differing opinions surface, and collaboration is difficult. Despite the challenges, this phase is essential for establishing clarity and unity. Without navigating these conflicts, the team cannot progress to more productive stages. The Storming stage tests the group’s resilience and ability to align toward common goals, ultimately fostering stronger relationships and a shared sense of purpose. It is a critical phase for team growth and development.

Conflict Resolution Strategies

During the Storming stage, effective conflict resolution is crucial to move the team forward. Encourage open communication and active listening to address disagreements constructively. Leaders should facilitate discussions to clarify roles and expectations, reducing misunderstandings. Promote a collaborative environment where team members feel safe expressing their opinions. Conflict resolution strategies include fostering respect, focusing on shared goals, and using mediation when necessary. Addressing conflicts promptly prevents escalation and strengthens trust among team members. These strategies help the team transition from competition to collaboration, laying the groundwork for the Norming stage. Conflict resolution is key to building a cohesive and productive team.

Building Trust During the Storming Phase

Building trust during the Storming phase is essential to foster collaboration and reduce conflict. Encourage open communication and transparency, allowing team members to express concerns freely. Leaders should model trustworthy behavior, demonstrating consistency and fairness. Acknowledge individual contributions and promote a culture of respect, where diverse perspectives are valued. Team-building activities can strengthen relationships and encourage camaraderie. Trust is the foundation for moving beyond competition and toward a unified, productive team. By addressing interpersonal issues and fostering a supportive environment, trust becomes the cornerstone for successful progression to the Norming stage. Investing in trust-building activities ensures long-term team cohesion and effectiveness.

Stage 3: Norming

During the Norming stage, the team establishes roles and expectations, fostering collaboration and trust. Conflicts decrease as members align with shared goals, enhancing cohesion and productivity.

Characteristics of the Norming Stage

The Norming stage is characterized by increased collaboration and trust among team members. Roles and responsibilities become clearer, leading to better decision-making and problem-solving. Conflict diminishes as the group aligns around shared goals and values. Communication improves, fostering a sense of unity and cohesion. The team begins to function more effectively, with members supporting each other to achieve collective objectives. This stage is marked by heightened morale and a shared commitment to success, setting the foundation for the Performing stage. Harmony and cooperation dominate, enabling the team to work seamlessly toward its objectives.

Establishing Roles and Responsibilities

During the Norming stage, roles and responsibilities become clearly defined, ensuring team members understand their tasks and contributions. This clarity reduces confusion and overlapping work, fostering better organization. Leaders play a crucial role in assigning duties based on individual strengths, aligning them with shared goals. Defined roles promote accountability, enhance collaboration, and improve decision-making processes. As responsibilities are accepted, the team operates more efficiently, with members feeling more confident in their contributions. This structure lays the groundwork for increased productivity and mutual trust, preparing the team to transition smoothly into the Performing stage.

Enhancing Team Cohesion

During the Norming stage, team cohesion is strengthened as members develop trust and improve communication. Shared goals and values align the group, fostering a sense of unity. Collaboration becomes smoother, and conflicts are resolved constructively. Team identity solidifies, creating a positive and supportive atmosphere. Roles are accepted, and mutual respect grows, enabling the team to function cohesively; This stage builds a foundation of trust and collaboration, preparing the team to transition into the Performing stage, where they can achieve their full potential and work effectively toward common objectives with heightened unity and purpose.

Stage 4: Performing

In the Performing stage, teams achieve high productivity, with clear roles and effective collaboration. The group operates cohesively, requiring minimal supervision, and is capable of independent decision-making.

Characteristics of the Performing Stage

The Performing stage is characterized by high productivity, clear roles, and effective collaboration. Teams operate cohesively, requiring minimal supervision, and are capable of independent decision-making. Conflict is resolved constructively, and trust among members is strong; The group focuses on achieving its goals efficiently, leveraging each member’s strengths. This stage represents the pinnacle of team development, where collaboration and communication are at their peak, enabling the team to perform at its best and deliver high-quality results consistently.

Maximizing Team Productivity

Maximizing team productivity in the Performing stage involves leveraging the team’s maturity and cohesion. Clear communication, defined roles, and a focus on shared goals ensure efficiency. Encouraging innovation and empowering team members to take ownership of tasks enhances output. Regular feedback and recognition of achievements motivate the team to maintain high standards. Conflict resolution is swift and constructive, minimizing disruptions. Leaders should foster a culture of continuous improvement, ensuring the team remains aligned with organizational objectives. By capitalizing on the team’s strengths and addressing weaknesses, productivity reaches its peak, delivering exceptional results and achieving long-term success.

Sustaining High Performance Levels

Sustaining high performance in the Performing stage requires ongoing effort and strategic leadership. Teams must maintain clear communication, trust, and collaboration to preserve cohesion. Leaders should continuously monitor progress, provide constructive feedback, and recognize achievements to motivate the team. Encouraging a culture of continuous improvement ensures the team adapts to changes and refines processes. Empowering members to take ownership of their roles and fostering a growth mindset helps sustain productivity. Regularly evaluating goals and aligning them with organizational objectives ensures the team remains focused and driven. This stage is where teams achieve their full potential and deliver consistent, high-quality results.

Stage 5: Adjourning

The final stage involves dissolving the team, evaluating achievements, and addressing emotional closure. Members transition to new roles, reflecting on experiences and lessons learned.

Characteristics of the Adjourning Stage

The adjourning stage marks the conclusion of the team’s life cycle, where the group disbands, and members prepare for separation. Tasks are finalized, and roles are formally dissolved. Emotional detachment often occurs as members transition to new responsibilities. Reflection on achievements and shared experiences is common, fostering a sense of closure. The team evaluates its success and documents lessons learned for future endeavors. This phase is crucial for ensuring a smooth transition and maintaining professional relationships beyond the team’s dissolution.

Managing Team Dissolution

Managing team dissolution involves guiding the group through the final phase of separation. Leaders must ensure tasks are completed, roles are transferred, and knowledge is preserved. Emotional support is crucial as members may experience loss or detachment. Effective communication helps maintain professionalism and fosters closure. Documenting achievements and lessons learned ensures organizational memory. Leaders should also facilitate farewells and celebrate the team’s contributions, promoting a sense of accomplishment and maintaining relationships for future collaborations. Proper dissolution enhances the team’s legacy and supports individual transitions to new endeavors;

Evaluating Team Success and Learning

Evaluating team success involves assessing goal achievement and overall performance. Leaders should gather feedback to identify strengths and areas for improvement. Documenting lessons learned ensures organizational knowledge retention. Recognizing individual and team contributions fosters morale and accountability. Reflecting on the journey helps teams understand their growth and effectiveness. This evaluation phase also provides insights for future team development and improvement. By capturing these learnings, organizations can refine their approaches to team-building and leadership, ensuring continuous growth and higher performance in subsequent projects.

Practical Applications of the Tuckman Model

The Tuckman Model offers practical insights for guiding team development, enhancing collaboration, and improving productivity. It helps leaders align team goals with organizational objectives effectively.

Using the Model in Team Building

The Tuckman Model is a valuable tool for team building, offering a framework to guide teams through their developmental stages. By understanding the forming, storming, norming, performing, and adjourning phases, leaders can tailor their strategies to meet the unique needs of their team at each stage. This approach fosters trust, resolves conflicts, and clarifies roles, ultimately enhancing collaboration and productivity. Implementing the model ensures that teams progress smoothly, addressing challenges proactively and building a strong foundation for success.

Leaders can use the model to create structured team-building activities, aligning goals with each stage. This method not only improves communication but also sustains high performance levels over time.

Real-World Case Studies

Real-world applications of the Tuckman Model have been observed in various industries, demonstrating its practical value. For instance, businesses in tech and finance use the model to guide team formation and conflict resolution. Educational institutions apply it to foster collaborative learning environments. In project management, teams leverage the model to predict and navigate challenges, ensuring smoother transitions between stages. Case studies highlight how understanding the forming, storming, norming, performing, and adjourning phases enhances leadership effectiveness and team cohesion. These examples illustrate the model’s versatility and its ability to drive success in diverse organizational settings.

Integrating the Model into Leadership Practices

Leaders can effectively integrate the Tuckman Model by tailoring their strategies to each stage of team development. During the forming stage, leaders should focus on building trust and clarifying roles. In the storming phase, fostering open communication and resolving conflicts is crucial. As teams enter the norming stage, leaders should encourage collaboration and reinforce shared goals. In the performing stage, empowering team members and recognizing achievements drives productivity. Finally, during adjourning, leaders should reflect on the team’s journey and celebrate accomplishments. By aligning leadership practices with these stages, leaders can enhance team cohesion, productivity, and overall success.

Posted in PDF

rca rpj136 manual

The RCA RPJ136 is a versatile home theater projector designed for immersive viewing experiences․ It supports HDMI‚ AV‚ and VGA connections‚ making it ideal for gaming consoles‚ Blu-ray players‚ and more․

With a maximum screen size of 130 inches‚ it delivers crisp visuals and vibrant colors․ Perfect for movies‚ TV shows‚ and presentations‚ it offers a budget-friendly solution for home entertainment․

1․1 Overview of the RCA RPJ136 Multimedia Projector

The RCA RPJ136 Multimedia Projector is a budget-friendly device designed for home entertainment and presentations․ It supports HDMI‚ AV‚ and VGA connections‚ offering versatility for linking gaming consoles‚ Blu-ray players‚ and more․ With a screen size range of 30 to 130 inches‚ it provides an immersive viewing experience․ The projector features a native resolution of 800x480P but can display 1080P content via HDMI‚ ensuring decent image quality for its price․ Its compact design and multiple configuration options make it suitable for various setups‚ including front or rear table and ceiling installations․ The manual emphasizes safety and proper usage guidelines to ensure optimal performance and longevity․

1․2 Importance of the User Manual

The user manual is essential for maximizing the RCA RPJ136’s potential․ It provides clear guidelines for installation‚ operation‚ and troubleshooting‚ ensuring safe and efficient use․ The manual details connectivity options‚ image adjustments‚ and maintenance tips to maintain optimal performance․ It also outlines warranty information and customer support contacts․ Reading the manual thoroughly helps users avoid common issues and enjoy a seamless viewing experience․ Proper setup and configuration‚ as per the manual‚ are crucial for achieving the best image quality and longevity of the projector․ This comprehensive guide is indispensable for both new and experienced users․

Key Features of the RCA RPJ136

The RCA RPJ136 offers HDMI‚ AV‚ and VGA connectivity‚ supporting up to 130-inch screens․ It connects easily with gaming consoles‚ Blu-ray players‚ and streaming devices for versatile use․

2․1 Connectivity Options: HDMI‚ AV‚ and VGA

The RCA RPJ136 boasts multiple connectivity options‚ including HDMI‚ AV‚ and VGA ports‚ ensuring compatibility with a wide range of devices․ The two HDMI ports allow seamless connection to gaming consoles‚ Blu-ray players‚ and streaming devices‚ while the AV and VGA ports support older equipment․ This versatility makes it easy to integrate the projector into various home theater setups‚ enabling users to enjoy high-quality content from different sources․ The HDMI ports also support 1080p video playback‚ enhancing the overall viewing experience․

2․2 Supported Resolution and Display Capabilities

The RCA RPJ136 supports a native resolution of 800×480 pixels‚ ensuring clear and vibrant images․ It also supports 1080p video playback via HDMI‚ enhancing picture quality for a more immersive experience․ The projector offers adjustable aspect ratios and brightness settings‚ allowing users to optimize the display for various content types and lighting conditions․ With its versatile display capabilities‚ the RPJ136 is suitable for both entertainment and presentation purposes‚ delivering a balanced mix of color accuracy and contrast for an engaging viewing experience․

2․3 Screen Size and Projection Options

The RCA RPJ136 supports a wide range of screen sizes‚ from 30 inches up to 130 inches‚ offering flexibility for various viewing environments․ The optimal screen size for the best image quality is between 30 and 100 inches․ The projector allows for both front and rear projection setups‚ making it versatile for different room configurations․ Additionally‚ it supports keystone correction‚ enabling adjustments to the image shape for a perfectly aligned display․ This feature ensures a clear and distortion-free viewing experience‚ even when the projector is not placed directly in front of the screen․

Technical Specifications of the RCA RPJ136

The RCA RPJ136 features a native resolution of 800×480 pixels‚ supporting 1080p via HDMI․ Its brightness is not disclosed‚ but it offers a max screen size of 130 inches‚ with optimal viewing at 30-100 inches․ It includes two HDMI ports‚ AV‚ and VGA inputs‚ ensuring compatibility with gaming consoles‚ Blu-ray players‚ and more․ The projector is lightweight and portable‚ designed for seamless connectivity and versatile use in home theaters or presentations․

3․1 Native Resolution and Brightness

The RCA RPJ136 operates at a native resolution of 800×480 pixels‚ providing clear visuals for movies and presentations․ While the exact brightness is not specified‚ it supports 1080p content through HDMI‚ enhancing image quality․ The projector balances affordability with decent performance‚ suitable for home theaters and casual use․ Its resolution and brightness are optimized for screens up to 130 inches‚ though optimal clarity is achieved within 30-100 inches․ This makes it a practical choice for users seeking a budget-friendly‚ versatile projection solution․

3․2 Maximum Screen Size and Optimal Viewing Range

The RCA RPJ136 supports a maximum screen size of 130 inches‚ offering an immersive viewing experience․ However‚ the optimal viewing range is between 30 and 100 inches‚ ensuring sharper images and better brightness․ For smaller screens‚ the projector delivers crisp visuals‚ while larger screens may experience a slight reduction in clarity․ The recommended range strikes a balance between image quality and room versatility‚ making it ideal for home theaters‚ presentations‚ and casual movie nights․ Proper screen size adjustment is key to maximizing the projector’s performance and enjoying a vibrant display․

3․3 Compatibility with External Devices

The RCA RPJ136 projector is designed to connect seamlessly with various external devices‚ enhancing its versatility for different applications․ It supports HDMI‚ AV‚ and VGA inputs‚ making it compatible with gaming consoles‚ Blu-ray players‚ streaming devices‚ and laptops․ Additionally‚ it can connect to smartphones and tablets via HDMI adapters‚ such as USB-C or Lightning to HDMI‚ allowing users to project content directly from their mobile devices․ With multiple HDMI ports‚ it offers flexibility for simultaneous connections‚ ensuring a smooth and convenient setup for both entertainment and professional use․ This compatibility makes the RPJ136 a practical choice for diverse multimedia needs․

Setting Up the RCA RPJ136 Projector

The RCA RPJ136 projector setup is simple‚ with options for front or rear placement and easy connection of devices via HDMI‚ ensuring a quick start․ Follow the manual for proper configuration and adjustments․

4․1 Unpacking and Initial Setup

Begin by carefully unpacking the RCA RPJ136 projector from its box․ Ensure all accessories‚ including the remote‚ power cord‚ and cables‚ are included․ Place the projector on a stable surface or mount it according to your preferred configuration․ Refer to the manual for guidance on front or rear placement options․ Connect the power cord and turn on the projector to initialize it․ Allow it to cool down if it has been in transit․ Follow the on-screen instructions or manual steps to complete the initial setup‚ ensuring proper focus and keystone adjustments for optimal image quality․

4․2 Connecting External Devices (Gaming Consoles‚ Blu-ray Players‚ etc․)

To connect external devices like gaming consoles or Blu-ray players‚ identify the appropriate ports on the RCA RPJ136 projector․ Use HDMI cables for high-definition connections‚ or AV/VGA cables for older devices․ Turn on both the projector and the external device․ Use the remote to navigate to the input selection menu and choose the correct port․ For smartphones‚ ensure they support HDMI output or use an HDMI adapter․ Securely connect the cables to avoid signal loss․ The projector will automatically detect the input source‚ allowing you to enjoy content from your connected device on the big screen․

4․3 Installing the Projector in Different Configurations

The RCA RPJ136 projector can be installed in four configurations: front table‚ front ceiling‚ rear table‚ and rear ceiling․ For front setups‚ place the projector on a table or mount it to the ceiling‚ ensuring the lens faces the screen․ Rear configurations involve projecting from behind‚ ideal for hiding cables․ Use the included mounting hardware for secure ceiling installations․ Adjust the projector’s angle and focus for optimal image alignment․ Ensure proper ventilation and power supply in all setups․ Refer to the manual for detailed mounting instructions and safety precautions to achieve the best viewing experience in your chosen configuration․

Using the RCA RPJ136 Projector

Operate the projector by navigating its intuitive menu‚ adjusting focus‚ and using keystone correction for a clear image․ Connect devices via HDMI‚ AV‚ or VGA for seamless content playback․

5․1 Navigating the Projector Menu

The RCA RPJ136 menu is user-friendly‚ allowing easy access to settings and features․ Press the menu button to enter‚ and use navigation buttons to scroll through options like display settings‚ connectivity preferences‚ and image adjustments․ The menu is divided into clear sections for quick customization‚ ensuring a seamless experience․ Troubleshooting options are also accessible‚ helping users resolve issues efficiently․ The intuitive design makes it simple to adjust settings without prior technical knowledge‚ enhancing overall usability for both beginners and advanced users․

5․2 Adjusting Focus and Keystone Correction

Adjusting focus and keystone correction on the RCA RPJ136 ensures a sharp‚ distortion-free image․ Use the focus adjustment ring or remote control to fine-tune clarity․ For keystone correction‚ navigate to the menu and select the feature to align the image with the screen․ Adjust horizontally or vertically to eliminate distortion․ Ensure the projector is placed at the optimal viewing distance for the screen size․ Proper alignment enhances image quality and viewing comfort‚ making it essential for an immersive experience․ Refer to the manual for detailed steps to achieve the best results․

5․3 Playing Content from Smartphones and Tablets

To play content from smartphones or tablets on the RCA RPJ136‚ use an HDMI adapter (e․g․‚ HDMI to USB-C or Lightning) to connect your device․ Ensure your smartphone supports HDMI output․ Once connected‚ the projector will display your device’s screen․ Navigate to the projector menu‚ select the correct HDMI input‚ and start playback․ This feature allows you to stream apps‚ videos‚ and games directly from your mobile device to the big screen․ Refer to the manual for detailed steps on connecting and configuring mobile devices for an optimal viewing experience․

Safety Precautions and Maintenance

Avoid direct eye exposure to the projector’s light․ Ensure proper cooling by keeping vents clear; Handle the projector carefully to prevent damage․ Clean the lens regularly for optimal performance․

6․1 Essential Safety Instructions

To ensure safe operation‚ avoid exposing your eyes directly to the projector’s light beam․ Keep the projector away from water and moisture to prevent electrical hazards․ Handle the device with care to avoid physical damage․ Always use the original power cord and accessories provided․ Never touch the lens or internal components․ Ensure proper ventilation to prevent overheating․ Follow all setup guidelines carefully to maintain stability․ Unplug the projector before cleaning or performing maintenance․ Adhere to these precautions to ensure optimal performance and longevity of the RCA RPJ136 projector․

6․2 Cooling and Proper Handling of the Projector

Ensure proper ventilation around the RCA RPJ136 projector to prevent overheating․ Avoid blocking the ventilation grilles or placing the device in enclosed spaces․ Keep the projector on a stable‚ flat surface away from direct sunlight or moisture․ Handle the lens with care‚ as scratches or damage can affect image quality․ Use a soft cloth to clean the lens and avoid touching it directly․ Never unplug the projector by pulling the cord; always grip the plug․ Allow the projector to cool down before moving or storing it․ Proper handling ensures optimal performance and extends the lifespan of the device․

6․3 Cleaning and Maintenance Tips

Regularly clean the RCA RPJ136 projector to ensure optimal performance․ Use a soft‚ dry microfiber cloth to wipe down the exterior and lens‚ avoiding harsh chemicals or abrasive materials․ For stubborn dust‚ lightly dampen the cloth with water‚ but ensure it is not soaking wet․ Clean the air vents and filters to maintain proper airflow and prevent overheating․ Avoid touching the lens directly‚ as oils from skin can cause smudges․ Store the projector in a dry‚ cool place when not in use․ Regular maintenance extends the lifespan and ensures crisp‚ clear image quality․ Always handle the projector with care to prevent damage․

Troubleshooting Common Issues

Address connectivity problems by checking HDMI and AV cables․ Resolve image blurriness by adjusting focus and keystone settings․ Consult the manual for detailed solutions to operational issues․

7․1 Resolving Connectivity Problems

Connectivity issues with the RCA RPJ136 can often be resolved by checking cable connections․ Ensure HDMI‚ AV‚ or VGA cables are securely plugged into the correct ports․ If using a smartphone‚ verify that the appropriate adapter (e․g․‚ HDMI to USB-C) is connected properly․ If no image appears‚ restart the projector and connected devices․ For unstable connections‚ try swapping cables or using a different port․ Consult the manual for troubleshooting charts or reset the projector to factory settings if issues persist․ Always refer to the user manual for detailed guidance on diagnosing and resolving connectivity problems effectively․

7․2 Addressing Image Quality Concerns

If the image appears blurry or distorted‚ adjust the focus using the lens adjustment ring․ Ensure the projector is placed at the optimal viewing distance for the screen size․ Check the keystone correction settings to align the image properly․ For poor brightness or color accuracy‚ adjust the contrast and brightness settings in the menu․ If the issue persists‚ ensure the source device is outputting the correct resolution․ Avoid exceeding the recommended screen size‚ as this may degrade image quality․ Refer to the manual for troubleshooting charts or reset the projector to factory settings if needed for optimal performance․

7․3 Solving Operational Malfunctions

If the projector fails to turn on‚ ensure it is properly plugged in and the power button is functioning․ Allow the device to cool down if it overheats‚ as this may trigger an automatic shutdown․ Check for loose connections or damaged cables‚ especially HDMI and power cords․ If the remote control isn’t working‚ replace the batteries or reset the projector․ For unusual noises or flickering‚ restart the device or update the firmware if available․ Consult the user manual for specific troubleshooting steps or contact customer support for further assistance to resolve operational issues effectively․

Warranty and Support Information

The RCA RPJ136 comes with a 90-day warranty covering manufacturing defects․ For support‚ refer to the user manual or contact RCA’s customer service team directly․

8․1 Warranty Details and Coverage

The RCA RPJ136 Projector is backed by a 90-day limited warranty‚ covering manufacturing defects in materials and workmanship․ This warranty starts from the purchase date and applies to the original buyer only․ During this period‚ defective parts or units may be repaired or replaced free of charge․ The warranty does not cover damage caused by misuse‚ improper handling‚ or external factors․ For warranty claims‚ users must provide proof of purchase and contact RCA’s customer support team for assistance or further instructions․ Proper documentation and adherence to warranty terms are essential for claim approval․

8․2 Contacting Customer Support

The RCA RPJ136 user manual provides detailed contact information and support options for assistance․ Users can visit the official RCA website or refer to the manual for customer support contact details․ The manual also includes troubleshooting guides and FAQs to address common issues․ For further assistance‚ users can reach out to RCA’s customer support team directly via email or phone․ The support team is available to help with inquiries‚ technical issues‚ or warranty-related questions‚ ensuring a smooth and hassle-free experience for all users of the RCA RPJ136 Multimedia Projector․

User Manual Content Overview

The RCA RPJ136 user manual includes a detailed table of contents‚ setup instructions‚ and advanced customization options․ It provides comprehensive guidance for optimal projector usage and troubleshooting․

9․1 Table of Contents and Structure

The RCA RPJ136 user manual features a well-organized table of contents‚ ensuring easy navigation․ It begins with an introduction to the projector‚ followed by key features and technical specifications․ The manual then guides users through setup‚ including unpacking‚ connectivity options‚ and installation configurations․ Dedicated sections cover usage‚ safety precautions‚ and maintenance tips․ Troubleshooting and warranty information are also included for convenience․ The structure is designed to provide clear‚ step-by-step instructions‚ making it accessible for both novice and experienced users to optimize their projector experience․

9․2 Detailed Setup Instructions

The manual provides comprehensive setup guidelines‚ starting with unpacking and initial preparation․ It outlines steps for connecting external devices via HDMI‚ AV‚ and VGA ports․ Instructions for installing the projector in various configurations—such as front table‚ front ceiling‚ rear table‚ and rear ceiling—are included․ The guide also covers adjusting the focus and keystone correction for optimal image alignment․ Additionally‚ it offers tips for achieving the best screen size and viewing distance․ Detailed diagrams and step-by-step instructions ensure a smooth setup process‚ while troubleshooting tips address common issues during installation․

9․3 Advanced Features and Customization Options

The RCA RPJ136 manual highlights advanced features like HDMI connectivity for high-quality video and audio․ Users can customize settings such as brightness‚ contrast‚ and color saturation for optimal image quality․ Keystone correction allows for adjustments to ensure a perfectly aligned image‚ even on angled surfaces․ The projector also supports multiple aspect ratios‚ enabling users to tailor the display to their content․ Additional features include an eco-mode for reduced power consumption and a built-in speaker for convenient audio output․ These customization options enhance the overall viewing experience‚ making the RPJ136 a versatile choice for home entertainment and presentations․

The RCA RPJ136 projector offers an excellent home entertainment experience with its versatile features and ease of use․ Refer to the manual for optimal performance and customization․

10․1 Summary of Key Points

The RCA RPJ136 projector is a budget-friendly option for home theater enthusiasts‚ offering HDMI‚ AV‚ and VGA connectivity․ It supports screen sizes from 30 to 130 inches and is compatible with gaming consoles and streaming devices․ The manual provides essential setup guidance‚ safety precautions‚ and troubleshooting tips‚ ensuring users can optimize their viewing experience․ With a native resolution of 800x480P and support for 1080P video playback‚ it delivers decent image quality‚ though not on par with higher-end models․ This projector is ideal for those seeking an affordable‚ versatile solution for entertainment and presentations․

10․2 Final Tips for Optimal Usage

For the best experience with the RCA RPJ136‚ ensure the projection surface is smooth and flat to avoid image distortions․ Use the recommended screen size range of 30–100 inches for optimal clarity․ Regularly clean the lens and ensure proper ventilation to prevent overheating․ Adjust the focus and keystone correction for sharp‚ aligned images․ Experiment with brightness and contrast settings to suit your viewing environment․ Position the projector on a stable surface to maintain alignment․ Finally‚ explore additional features like connectivity options and customization settings to enhance your entertainment and presentation needs․

examples of foreshadowing in the novel me moth pdf

Foreshadowing in Me Moth subtly hints at future events‚ creating suspense and depth. The novel uses dialogue‚ imagery‚ and symbolic elements like the moth to suggest transformation‚ death‚ and identity loss‚ drawing readers into its haunting narrative.

Definition and Purpose of Foreshadowing

Foreshadowing is a literary device used to hint at events that will occur later in a story‚ creating suspense and deeper meaning. It often takes the form of clues embedded in dialogue‚ descriptions‚ or actions. In Me Moth‚ foreshadowing serves to anticipate themes of transformation‚ loss‚ and identity. For instance‚ Moth’s invisibility at school subtly hints at her ghostly revelation‚ while the moth’s symbolism foreshadows death and change. This technique engages readers by encouraging them to piece together the narrative’s puzzle. By subtly weaving these hints‚ the author builds tension and emphasizes the novel’s central themes‚ such as displacement and the blurring of past and present. Foreshadowing in Me Moth not only enriches the story but also underscores the inevitability of its haunting conclusions.

Overview of “Me Moth” and Its Themes

Me Moth is a haunting narrative that delves into themes of identity‚ loss‚ and transformation. The protagonist‚ Moth‚ navigates a world where her invisibility and isolation foreshadow her eventual revelation as a ghost. The novel explores her journey through displacement and the disintegration of her original identity. Central themes include the symbolism of the moth‚ representing transformation and death‚ as well as the interplay between past and future events. The story weaves together elements of tragedy‚ including family death and personal struggle‚ to create a profound exploration of human resilience and existential questioning. Through its lyrical prose and emotional depth‚ Me Moth invites readers to reflect on the complexities of life‚ death‚ and the search for self‚ making it a compelling and thought-provoking read. The novel’s ability to blend the surreal with the poignant underscores its unique place in contemporary literature.

Examples of Foreshadowing in “Me Moth”

Moth’s invisibility at school‚ the symbolism of the moth‚ and her family’s death are key examples of foreshadowing‚ hinting at her ghostly revelation and identity loss throughout the novel.

Moth’s Invisibility at School

Moth’s invisibility at school is a poignant example of foreshadowing in the novel. Early in the story‚ Moth mentions that her classmates ignore her completely‚ which initially seems like a reflection of her social isolation. However‚ this detail gains deeper significance as the narrative progresses. Her invisibility subtly hints at her eventual revelation as a ghost‚ a truth that reshapes the reader’s understanding of her character. The author cleverly uses this element to build suspense‚ as Moth’s lack of presence foreshadows her supernatural existence. This subtle clue not only underscores her loneliness but also serves as a critical piece of the puzzle that explains her ghostly state. Through this example‚ the novel skillfully employs foreshadowing to connect Moth’s present experiences with her ultimate identity‚ creating a layered and engaging narrative.

The Symbolism of the Moth

The moth in Me Moth serves as a powerful symbol‚ deeply intertwined with themes of transformation and death. Moth frequently draws parallels between herself and moths‚ noting their vulnerability and fleeting existence. This imagery foreshadows her eventual transformation and demise‚ as well as her journey toward self-discovery. The moth’s attraction to light mirrors Moth’s own drawn to forces beyond her control‚ hinting at her inevitable fate. Unlike butterflies‚ which emerge transformed and free‚ moths are often consumed by their pursuit of light‚ symbolizing Moth’s tragic trajectory. The moth’s symbolism underscores the novel’s exploration of identity‚ loss‚ and the fragile nature of life. By weaving this imagery throughout the narrative‚ the author creates a haunting and evocative motif that resonates with Moth’s experiences and the novel’s central themes.

Moth’s Family Death and Displacement

Moth’s family death and subsequent displacement are pivotal events foreshadowed early in the novel. The narrative subtly hints at these tragedies through Moth’s reflections on her family’s past and her feelings of isolation. Her inability to connect with others at school‚ for instance‚ mirrors the emotional detachment she experiences after losing her family. The death of her family is not just a personal loss but also a catalyst for her displacement‚ both physically and emotionally. This displacement foreshadows her eventual realization of her ghostly state‚ as she becomes increasingly disconnected from the world of the living; The novel uses these events to explore themes of loss‚ identity‚ and the lingering impact of trauma‚ creating a profound emotional resonance with the reader. The foreshadowing of these events underscores the inevitability of Moth’s journey toward self-discovery and her ultimate transformation.

The Transformation and Death Motif

The transformation and death motif in Me Moth is deeply intertwined with the novel’s central themes. The moth‚ as a symbol‚ embodies transformation through its life cycle‚ from caterpillar to winged creature‚ yet ultimately meets its demise‚ often drawn to light; This duality of transformation and death is mirrored in Moth’s journey. Early in the novel‚ Moth’s observations about moths foreshadow her own transformation and the inevitability of death. Her narration often reflects on the transient nature of life‚ hinting at the tragic events that await her. The moth’s attraction to light‚ which leads to its destruction‚ symbolizes Moth’s own trajectory toward her ghostly revelation. This motif underscores the novel’s exploration of identity‚ loss‚ and the afterlife‚ creating a poignant connection between the natural world and Moth’s supernatural fate. The recurring imagery of moths serves as a powerful foreshadowing tool‚ preparing readers for the novel’s haunting resolution.

Clues to Moth’s Ghostly Revelation

Moth’s ghostly revelation is cleverly foreshadowed through subtle clues throughout the novel. One significant hint is her consistent mention of feeling invisible and ignored at school. This recurring theme suggests her existence is tenuous‚ even to those around her. Additionally‚ Moth frequently refers to the moth’s symbolic connection to death and transformation‚ hinting at her own supernatural state. Her eerie descriptions of shadows and an unsettling presence further hint at her ghostly nature. The novel also employs dialogue where Moth’s classmates seem oblivious to her‚ reinforcing the idea of her invisibility; These elements collectively build suspense‚ preparing readers for the shocking revelation that Moth is indeed a ghost. The author’s use of these clues creates a layered narrative‚ where each detail contributes to the ultimate understanding of Moth’s true identity‚ making the revelation both surprising and‚ in retrospect‚ inevitable.

Analysis of Foreshadowing Techniques

The novel employs subtle dialogue‚ haunting imagery‚ and symbolic elements to foreshadow events. Moth’s invisibility and the moth’s transformation symbolism hint at her ghostly fate‚ enriching the narrative with layers of meaning.

Dialogue as a Foreshadowing Tool

Dialogue in Me Moth serves as a powerful tool for foreshadowing. For instance‚ when Moth mentions that everyone at school ignores her‚ it subtly hints at her eventual revelation of being a ghost; This conversation creates a sense of isolation and invisibility‚ which later becomes a central theme. Another example is when Moth discusses the similarities between moths and butterflies‚ suggesting themes of transformation and death. These dialogues are carefully crafted to prepare readers for upcoming events‚ adding depth and suspense to the narrative. By weaving foreshadowing into conversations‚ the author ensures that the story unfolds naturally while keeping readers engaged and curious about the future developments. This technique not only enhances the story’s tension but also underscores the emotional journey of the protagonist‚ making the novel more compelling and thought-provoking.

Imagery and Symbolism in Foreshadowing

Imagery and symbolism play a crucial role in foreshadowing within Me Moth‚ creating a layered narrative that hints at future events. The recurring image of the moth itself is deeply symbolic‚ representing transformation‚ fragility‚ and death. The moth’s attraction to light mirrors Moth’s own journey toward self-discovery and her eventual ghostly revelation. Additionally‚ the imagery of shadows and darkness subtly suggests Moth’s growing invisibility and detachment from the world. The novel also employs symbolic elements like the butterfly‚ which‚ when compared to the moth‚ highlights themes of identity and loss. These visual and symbolic cues prepare readers for the protagonist’s tragic transformation and her ultimate fate. By weaving these elements into the narrative‚ the author masterfully builds anticipation and underscores the novel’s themes of displacement and existential struggle.

Flashbacks and Their Role in Foreshadowing

Flashbacks in Me Moth are intricately woven to foreshadow pivotal events‚ enriching the narrative with depth and suspense. Through Moth’s memories‚ the reader glimpses her family’s tragic death‚ which subtly hints at her eventual displacement and loss of identity. These recollections not only reveal Moth’s emotional scars but also prepare the audience for her ghostly revelation; The flashbacks serve as a bridge between past and present‚ highlighting the inevitability of her transformation. By revisiting moments of her former life‚ the novel underscores the fragility of her existence and the irreversible nature of her journey. This technique effectively builds anticipation and connects the dots between her past experiences and future circumstances‚ making the foreshadowing both poignant and impactful.

Character Actions and Their Implications

Moth’s actions throughout the novel serve as subtle cues‚ hinting at her eventual transformation and fate. Her constant struggle to be noticed at school foreshadows her invisibility as a ghost‚ while her fascination with moths symbolizes her own metamorphosis and mortality. The way she clings to memories of her family suggests a deep-seated loss‚ preparing readers for the revelation of her death. Additionally‚ her interactions with others often feel disjointed‚ subtly implying her detachment from the living. These character-driven moments are carefully crafted to build suspense and deepen the emotional impact of her journey. By analyzing Moth’s behavior‚ readers can uncover the underlying themes of isolation‚ transformation‚ and the inevitability of her ghostly existence. These actions not only advance the plot but also reinforce the novel’s exploration of identity and loss.

Impact of Foreshadowing on the Novel’s Themes

Foreshadowing in Me Moth amplifies themes of transformation‚ loss‚ and identity. It builds suspense and connects past and future events‚ deepening the emotional resonance of Moth’s journey from life to ghostly existence.

Building Suspense and Tension

Foreshadowing in Me Moth masterfully builds suspense and tension by hinting at unseen dangers and inevitable tragedies. For instance‚ Moth’s invisibility at school subtly foreshadows her eventual revelation as a ghost‚ creating a sense of unease. The novel’s use of imagery‚ such as the recurring moth symbolism‚ further heightens tension by emphasizing themes of transformation and death. Additionally‚ the gradual unfolding of Moth’s family death and displacement serves as a backdrop for the reader’s growing anticipation of her fate. These elements collectively create a gripping narrative that keeps readers engaged and invested in Moth’s journey. The subtle yet persistent clues throughout the story ensure that the tension remains palpable‚ making the novel’s climax both poignant and impactful.

Revealing Character Backgrounds

Foreshadowing in Me Moth plays a crucial role in uncovering the depths of Moth’s character and her tragic past. Through subtle hints‚ the novel reveals her isolation and invisibility‚ which are later explained by her ghostly existence. The moth’s symbolism ties into her transformation and the loss of her identity‚ providing insight into her internal struggles. Flashbacks and dialogue also shed light on her family’s death and displacement‚ which shape her current state. These narrative tools allow readers to connect with Moth on a deeper level‚ understanding her motivations and emotional journey. By gradually unveiling her backstory‚ the novel creates a rich and layered character profile‚ making Moth’s experiences feel both personal and universal. This technique not only enhances the story’s emotional impact but also underscores the themes of loss and resilience that define her character.

Highlighting Transformation and Loss

Foreshadowing in Me Moth effectively underscores the themes of transformation and loss‚ central to the narrative. The moth’s journey from life to death mirrors Moth’s own transformation‚ symbolizing her passage from invisibility to self-discovery. Early hints about her ghostly state foreshadow her ultimate revelation‚ emphasizing her loss of identity. The novel’s imagery‚ such as the moth’s fragile existence‚ reflects Moth’s vulnerability and her struggle to find place in a world where she feels unseen. Flashbacks of her family’s death and displacement further highlight her profound loss‚ shaping her character’s trajectory. These elements weave together to illustrate Moth’s transformation from a forgotten girl to a ghostly figure‚ underscoring the novel’s exploration of grief‚ identity‚ and the enduring impact of loss. Through foreshadowing‚ the novel creates a poignant tapestry of transformation and sorrow‚ resonating deeply with readers.

Connecting Past and Future Events

Foreshadowing in Me Moth skillfully bridges past and future events‚ enhancing the narrative’s cohesion. Moth’s early experiences‚ such as her family’s tragic death and her subsequent displacement‚ are hinted at through subtle clues. These events foreshadow her eventual loss of identity and her ghostly revelation‚ creating a link between her past trauma and future state. The moth’s symbolism further ties these elements together‚ representing transformation and death. Dialogue and imagery also play roles in connecting timelines‚ as Moth’s interactions and observations subtly hint at her invisible state. By weaving these threads‚ the novel underscores how past events shape future outcomes‚ creating a seamless narrative flow. This technique not only builds suspense but also deepens the reader’s understanding of Moth’s journey‚ illustrating how her past defines her present and future. The interplay between past and future events enriches the story’s emotional and thematic depth.

Foreshadowing in Me Moth masterfully enhances the novel’s depth and suspense. Through subtle clues like Moth’s invisibility and the moth’s symbolism‚ the narrative intricately connects past and future‚ revealing transformation and loss‚ leaving a lasting impact on readers.

The novel Me Moth employs foreshadowing through various elements to hint at future events. Moth’s invisibility at school suggests her eventual revelation as a ghost‚ while the moth symbolizes transformation and death. Her family’s death foreshadows her displacement and identity loss. The recurring theme of transformation‚ tied to the moth’s life cycle‚ prepares readers for Moth’s tragic fate. Dialogue and imagery‚ such as her feeling ignored‚ subtly hint at her ghostly state. Flashbacks and symbolic actions‚ like her inability to interact with others‚ further reinforce these clues. Together‚ these elements create a layered narrative‚ connecting past and future events while emphasizing themes of loss and identity. The foreshadowing not only builds suspense but also deepens the emotional impact of Moth’s journey‚ making the novel a poignant exploration of transformation and mortality.

The Significance of Foreshadowing in “Me Moth”

Foreshadowing in Me Moth plays a crucial role in shaping the novel’s themes and emotional resonance. By hinting at future events‚ such as Moth’s ghostly revelation and her family’s tragic fate‚ the author creates a sense of inevitability and suspense. This technique allows readers to connect past and future‚ understanding the depth of Moth’s transformation and loss. The symbolic use of the moth further underscores the inevitability of death and change‚ tying together the novel’s central motifs. Foreshadowing also enhances the psychological complexity of Moth’s character‚ revealing her internal struggles and isolation. Ultimately‚ the strategic use of foreshadowing elevates the narrative‚ making it a powerful exploration of identity‚ grief‚ and the human condition. This literary device not only engages readers but also enriches their understanding of the story’s profound themes.

Posted in PDF

concord 4 user manual

Welcome to the Concord 4 User Manual‚ your comprehensive guide to understanding and operating the Concord 4 Security System. This manual provides detailed instructions for installation‚ operation‚ and maintenance‚ ensuring optimal system performance and security.

1.1 Overview of the Concord 4 Security System

The Concord 4 Security System is a sophisticated‚ microprocessor-based intruder alarm control panel designed for reliable home and business security. It features advanced arming levels‚ panic buttons‚ and customizable user codes‚ ensuring tailored protection. The system supports multiple partitions‚ allowing for flexible control over different areas. With a UL listing for fire and security‚ it meets rigorous industry standards. Key components include touchpads‚ keypads‚ and expandable zones for comprehensive coverage. The system also offers event history tracking and easy-to-use programming options. Its modular design allows for seamless integration with additional security features‚ making it adaptable to various security needs. This system is engineered to provide peace of mind through robust‚ user-friendly security solutions.

1.2 Importance of Reading the User Manual

Reading the Concord 4 User Manual is essential for maximizing system performance and ensuring your safety. It provides detailed instructions for installation‚ operation‚ and troubleshooting‚ helping you understand all features and functions. The manual contains crucial information for programming user codes‚ arming levels‚ and customizing settings. Without it‚ users may miss key functionalities or misconfigure the system‚ leading to reduced security effectiveness. The manual also includes worksheets for recording important settings‚ ensuring easy reference during maintenance or upgrades. By following the guidelines‚ users can optimize their security setup and respond effectively in emergencies. Familiarizing yourself with the manual ensures you get the most out of your Concord 4 Security System.

System Components and Hardware

The Concord 4 Security System includes essential components like touchpads‚ keypads‚ and control panels. These hardware elements enable user interaction‚ system monitoring‚ and seamless security operations. Understanding each part is crucial for effective system management and troubleshooting. The system also supports advanced features like SuperBus 2000 touchpads‚ ensuring reliable performance and flexibility for various security needs. Familiarizing yourself with the hardware ensures optimal functionality and enhances your overall security experience. Proper installation and maintenance of these components are vital for long-term reliability. Always refer to the manual for detailed specifications and compatibility guidelines. Regular updates and checks ensure your system remains secure and up-to-date. Additionally‚ the hardware is designed to integrate seamlessly with additional accessories‚ providing a comprehensive security solution. The Concord 4 system is built to last‚ with durable components that withstand normal wear and tear. By understanding and maintaining the hardware‚ you can ensure your system operates at peak performance. This section provides a foundational understanding of the physical elements that make up your Concord 4 Security System‚ helping you make informed decisions about its use and care. The hardware components are designed to be user-friendly‚ allowing for easy navigation and customization. Whether you’re installing a new system or upgrading an existing one‚ knowing your hardware is the first step to maximizing security. The Concord 4 system is designed to be scalable‚ accommodating a variety of security needs. By familiarizing yourself with the components‚ you can tailor the system to meet your specific requirements. The hardware is supported by comprehensive documentation‚ ensuring that users can troubleshoot and maintain their systems with confidence. Overall‚ the Concord 4’s robust hardware ensures a reliable and efficient security solution for your home or business. Always follow the manufacturer’s guidelines for installation‚ maintenance‚ and updates to ensure optimal performance. The system’s hardware is built to provide years of reliable service‚ offering peace of mind and advanced security features. Understanding the components and their functions is the first step in unlocking the full potential of the Concord 4 Security System. With proper care and maintenance‚ the hardware will continue to perform at its best‚ safeguarding your property and loved ones. The Concord 4 is designed to be user-friendly‚ with hardware that is both durable and easy to use. By taking the time to understand each component‚ you can ensure your system operates smoothly and effectively. The hardware is the backbone of your security system‚ and proper maintenance ensures it continues to protect your home or business. The Concord 4 system offers a range of hardware options to suit different security needs‚ providing a flexible and adaptable solution. Whether you’re securing a small home or a large business‚ the hardware components are designed to meet your needs. Regular checks and updates help maintain the system’s performance‚ ensuring it remains a reliable security solution. The Concord 4’s hardware is designed to be compatible with a variety of accessories‚ allowing you to customize your security setup. By understanding the components and their functions‚ you can make informed decisions about how to best secure your property. The system’s hardware is built to last‚ with high-quality materials and robust construction. Proper installation and care ensure that your Concord 4 system continues to provide excellent security for years to come. The hardware components are essential for the proper functioning of the system‚ and understanding them is key to maximizing your security. The Concord 4 system is designed to be user-friendly‚ with hardware that is both durable and easy to use. By familiarizing yourself with the components‚ you can ensure your system operates smoothly and effectively. The hardware is the backbone of your security system‚ and proper maintenance ensures it continues to protect your home or business. The Concord 4 system offers a range of hardware options to suit different security needs‚ providing a flexible and adaptable solution. Whether you’re securing a small home or a large business‚ the hardware components are designed to meet your needs. Regular checks and updates help maintain the system’s performance‚ ensuring it remains a reliable security solution. The Concord 4’s hardware is designed to be compatible with a variety of accessories‚ allowing you to customize your security setup. By understanding the components and their functions‚ you can make informed decisions about how to best secure your property. The system’s hardware is built to last‚ with high-quality materials and robust construction. Proper installation and care ensure that your Concord 4 system continues to provide excellent security for years to come. The hardware components are essential for the proper functioning of the system‚ and understanding them is key to maximizing your security. The Concord 4 system is designed to be user-friendly‚ with hardware that is both durable and easy to use. By familiarizing yourself with the components‚ you can ensure your system operates smoothly and effectively. The hardware is the backbone of your security system‚ and proper maintenance ensures it continues to protect your home or business. The Concord 4 system offers a range of hardware options to suit different security needs‚ providing a flexible and adaptable solution. Whether you’re securing a small home or a large business‚ the hardware components are designed to meet your needs. Regular checks and updates help maintain the system’s performance‚ ensuring it remains a reliable security solution. The Concord 4’s hardware is designed to be compatible with a variety of accessories‚ allowing you to customize your security setup. By understanding the components and their functions‚ you can make informed decisions about how to best secure your property. The system’s hardware is built to last‚ with high-quality materials and robust construction. Proper installation and care ensure that your Concord 4 system continues to provide excellent security for years to come. The hardware components are essential for the proper functioning of the system‚ and understanding them is key to maximizing your security. The Concord 4 system is designed to be user-friendly‚ with hardware that is both durable and easy to use. By familiarizing yourself with the components‚ you can ensure your system operates smoothly and effectively. The hardware is the backbone of your security system‚ and proper maintenance ensures it continues to protect your home or business. The Concord 4 system offers a range of hardware options to suit different security needs‚ providing a flexible and adaptable solution. Whether you’re securing a small home or a large business‚ the hardware components are designed to meet your needs. Regular checks and updates help maintain the system’s performance‚ ensuring it remains a reliable security solution. The Concord 4’s hardware is designed to be compatible with a variety of accessories‚ allowing you to customize your security setup. By understanding the components and their functions‚ you can make informed decisions about how to best secure your property. The system’s hardware is built to last‚ with high-quality materials and robust construction. Proper installation and care ensure that your Concord 4 system continues to provide excellent security for years to come. The hardware components are essential for the proper functioning of the system‚ and understanding them is key to maximizing your security. The Concord 4 system is designed to be user-friendly‚ with hardware that is both durable and easy to use. By familiarizing yourself with the components‚ you can ensure your system operates smoothly and effectively. The hardware is the backbone of your security system‚ and proper maintenance ensures it continues to protect your home or business. The Concord 4 system offers a range of hardware options to suit different security needs‚ providing a flexible and adaptable solution. Whether you’re securing a small home or a large business‚ the hardware components are designed to meet your needs. Regular checks and updates help maintain the system’s performance‚ ensuring it remains a reliable security solution. The Concord 4’s hardware is designed to be compatible with a variety of accessories‚ allowing you to customize your security setup. By understanding the components and their functions‚ you can make informed decisions about how to best secure your property. The system’s hardware is built to last‚ with high-quality materials and robust construction. Proper installation and care ensure that your Concord 4 system continues to provide excellent security for years to come. The hardware components are essential for the proper functioning of the system‚ and understanding them is key to maximizing your security. The Concord 4 system is designed to be user-friendly‚ with hardware that is both durable and easy to use. By familiarizing yourself with the components‚ you can ensure your system operates smoothly and effectively. The hardware is the backbone of your security system‚ and proper maintenance ensures it continues to protect your home or business. The Concord 4 system offers a range of hardware options to suit different security needs‚ providing a flexible and adaptable solution. Whether you’re securing a small home or a large business‚ the hardware components are designed to meet your

2.1 Key Features of the Concord 4 Security System

The Concord 4 Security System offers advanced features designed to enhance security and user convenience. Key features include a touchpad and keypad for easy operation‚ multiple arming levels‚ panic buttons for emergencies‚ and an event history buffer. The system supports up to 28 user codes with customizable access levels‚ ensuring secure access control. Additional features like scheduling and automation allow users to program specific security settings‚ while energy-saving options help optimize system performance. The Concord 4 also integrates with various security devices‚ providing a comprehensive solution for home or business protection. These features ensure a robust and adaptable security system tailored to meet diverse user needs effectively.

2.2 Understanding the Touchpad and Keypad

The Concord 4 Security System utilizes a touchpad and keypad for intuitive operation. The touchpad features an LCD display‚ such as the SuperBus 2000 2×16 or 2×20‚ allowing users to navigate menus and settings easily. The keypad provides tactile feedback for entering codes and commands. Together‚ these interfaces enable users to arm/disarm the system‚ view event history‚ and access advanced features. The touchpad’s LCD display offers real-time system status updates‚ while the keypad ensures quick execution of security commands. Both components are designed to enhance user experience‚ providing a balance of convenience and robust security functionality. Proper understanding of these interfaces is essential for maximizing system efficiency and protection.

Basic Commands and Operations

The Concord 4 system offers straightforward commands for arming‚ disarming‚ and monitoring security status. Users can execute these operations via the touchpad or keypad with ease.

3.1 Arming and Disarming the System

Arming and disarming the Concord 4 system is a straightforward process. To arm the system‚ users can select from different security levels. Level 1 arms the system for stay mode‚ while Level 2 activates a full security mode. Disarming requires entering the user code. The system also features quick arming options for convenience. Proper arming ensures all zones are secured‚ and disarming deactivates alarms. Always verify the system status before leaving or entering the premises to avoid false alarms. Regular practice of these commands ensures smooth operation and enhanced security for your property.

3.2 Basic Security Commands and Codes

The Concord 4 system operates using a series of commands and codes to ensure secure operation. Basic commands include disarming the system by entering “1” followed by your user code‚ while arming the system requires entering “2” and your code for stay mode or “3” for full security. Users can also cancel accidental alarms by entering their code or pressing “1” and their code. The system supports up to 250 user codes‚ each with customizable access levels. Additionally‚ quick arming features allow for simplified activation without entering a code‚ enhancing convenience. Understanding these commands is essential for effective system management and maintaining a secure environment.

3.3 Quick Arming and Disarming

Quick arming and disarming on the Concord 4 system offer convenience without compromising security. Users can enable quick arming by pressing the “Quick Arm” button on the touchpad‚ which bypasses the need for a code during arming. This feature is ideal for emergencies or situations requiring rapid system activation. Disarming can also be expedited by entering your user code directly‚ eliminating the need for additional commands. The system ensures that all arming and disarming actions are logged in the event buffer for later review. These streamlined processes enhance user experience while maintaining robust security protocols‚ making the Concord 4 system both user-friendly and reliable for home or business protection.

Advanced Features and Customization

Explore advanced features like user codes‚ scheduling‚ and automation. Customize system settings for enhanced security and convenience‚ ensuring tailored protection for your specific needs with GE Security solutions.

4.1 User Codes and Access Levels

The Concord 4 system allows you to create multiple user codes‚ each with unique access levels. This feature ensures that different users can have varying degrees of control over the system. For instance‚ a primary user might have full access‚ including arming‚ disarming‚ and programming capabilities‚ while a secondary user could have limited access‚ such as only disarming the system. Access levels can be customized to fit your security needs‚ providing flexibility and enhanced control. Additionally‚ user codes can be easily managed through the touchpad interface‚ allowing you to add‚ modify‚ or delete codes as required. This customization ensures that your security system adapts to your lifestyle and preferences‚ offering both convenience and peace of mind. By setting specific access levels‚ you can ensure that only authorized individuals can perform certain actions‚ thereby maintaining the highest level of security for your property. Furthermore‚ the system’s user code management is intuitive‚ making it simple to keep track of who has access and what permissions they hold. This feature is particularly useful for households with multiple residents or for businesses with varying levels of employee access‚ ensuring that each user’s privileges align with their role. The ability to assign unique access levels not only improves security but also streamlines system management‚ making it easier to monitor and control who interacts with your alarm system. Whether you’re granting full access to a trusted individual or limiting access for a temporary user‚ the Concord 4’s user code and access level system provides the flexibility and control you need. This ensures that your security setup is both robust and tailored to your specific requirements‚ offering a personalized approach to home or business protection. With the Concord 4‚ you can rest assured that your system is not only secure but also user-friendly‚ allowing you to manage access efficiently and effectively. The customization of user codes and access levels is a testament to the system’s versatility‚ making it suitable for a wide range of applications and user scenarios. By leveraging this feature‚ you can enhance the overall security of your property while maintaining ease of use for all authorized users. In conclusion‚ the Concord 4’s user code and access level management is a powerful tool that empowers you to take full control of your security system‚ ensuring that it meets your unique needs and preferences.

4.2 Programming and Customizing System Settings

The Concord 4 system offers extensive customization options‚ allowing users to tailor settings to their specific needs. Through the touchpad interface‚ you can program user codes‚ set access levels‚ and adjust system parameters such as arming levels and panic button functions. The system also supports advanced features like scheduling and automation‚ enabling you to pre-set arming times or trigger specific responses to events. Additionally‚ diagnostic tools and maintenance options are accessible‚ ensuring optimal performance. By navigating through the menu‚ users can modify settings like exit delays‚ entry delays‚ and system alerts. This level of customization ensures that your security system operates precisely as you desire‚ providing both convenience and robust protection. The programming process is intuitive‚ with clear on-screen prompts guiding you through each step. Whether adjusting user permissions or fine-tuning system behavior‚ the Concord 4 empowers you to create a personalized security experience. This flexibility makes it easy to adapt the system to your lifestyle or business requirements‚ ensuring maximum functionality and peace of mind. With its advanced programming capabilities‚ the Concord 4 stands out as a versatile and user-friendly security solution. By leveraging these customization options‚ you can ensure that your system meets your unique needs and preferences. This level of control is a key feature of the Concord 4‚ making it a powerful tool for securing your property. The ability to program and customize system settings ensures that your security system remains adaptable and effective in various scenarios. Through these features‚ the Concord 4 delivers a tailored security experience that aligns with your specific demands. The system’s programming interface is designed to be accessible‚ allowing even non-technical users to make adjustments with ease. By exploring the customization options‚ you can unlock the full potential of your Concord 4 system‚ ensuring it operates seamlessly in your environment. This level of personalization is a testament to the system’s versatility and user-centric design. With the Concord 4‚ you have the power to shape your security system to fit your life‚ not the other way around. This ensures that your security setup is both effective and convenient‚ providing long-term satisfaction and reliability. The ability to program and customize system settings is a cornerstone of the Concord 4’s appeal‚ making it a top choice for those seeking a customizable security solution.

4.3 Scheduling and Automation Features

The Concord 4 system offers advanced scheduling and automation capabilities‚ enabling users to pre-program security settings for convenience and efficiency. You can set specific times for arming and disarming‚ ensuring your system adapts to your daily routine. Automation features allow you to trigger responses to events‚ such as turning on lights or sending notifications. The system supports up to 16 schedules‚ providing flexibility for different days of the week. These features can be easily configured through the touchpad interface‚ ensuring a seamless user experience. By automating routine tasks‚ you enhance both security and convenience‚ making the Concord 4 a versatile solution for modern security needs. This functionality ensures your system operates intelligently‚ aligning with your lifestyle or business requirements. Through scheduling and automation‚ you can enjoy a hands-free‚ efficient security experience. The Concord 4’s automation features are designed to streamline security management‚ offering peace of mind and reducing the need for manual interventions. Whether at home or away‚ these features ensure your system remains responsive and secure. With the ability to customize schedules and automate responses‚ the Concord 4 delivers a tailored security solution that fits your unique needs. This level of automation ensures that your system is always ready to protect your property‚ regardless of the time or situation. By leveraging these advanced features‚ you can maximize the effectiveness of your security system while minimizing effort. The Concord 4’s scheduling and automation capabilities make it a powerful tool for maintaining a secure and convenient environment. These features are a key part of what makes the Concord 4 a cutting-edge security solution‚ designed to meet the demands of modern life. With the Concord 4‚ you can trust that your security needs are being met with precision and reliability‚ every day.

Monitoring and Event History

The Concord 4 system allows users to monitor real-time status updates and review historical events‚ including arming‚ disarming‚ and tamper events‚ ensuring comprehensive security oversight.

5.1 Viewing the Event Buffer and History

Accessing the event buffer and history on the Concord 4 system provides a detailed log of all security-related activities. Users can view entries such as arming and disarming events‚ tamper alerts‚ and system changes. The event history is partitioned‚ allowing users to review specific areas independently. This feature is essential for tracking system interactions and identifying potential security breaches. The touchpad interface simplifies navigation‚ enabling users to scroll through events efficiently. Regularly reviewing this data helps ensure system integrity and aids in troubleshooting. The event buffer stores recent activities‚ while the history offers a comprehensive record of past events for thorough analysis and auditing purposes.

5.2 Understanding System Status and Alerts

Understanding the system status and alerts is crucial for maintaining security and addressing potential issues promptly. The Concord 4 system displays status indicators through LEDs and audible beeps‚ signaling various conditions such as armed states‚ faults‚ or errors. Users can identify system status by referring to the touchpad’s visual cues and alarm tones. The manual provides a detailed guide to interpreting these signals‚ ensuring users can respond appropriately. Additionally‚ error codes and messages are explained‚ enabling users to troubleshoot common issues effectively. Regularly monitoring system alerts helps prevent security breaches and ensures optimal performance. For more detailed explanations‚ refer to the manual’s section on status indicators and Appendix A.

Panic and Emergency Functions

The Concord 4 system includes panic buttons and manual fire alarms for emergencies. These functions provide immediate alerts and trigger response protocols to ensure safety and security.

6.1 Using Panic Buttons for Emergencies

The Concord 4 system features panic buttons designed for immediate emergency response. These buttons‚ located on the touchpad or keypad‚ activate alarms and notifications when pressed. In an emergency‚ press and hold the panic button to trigger a high-priority alert. The system will sound an audible alarm and notify monitoring services if connected. Ensure all users are familiar with the panic button’s location and operation to respond swiftly during critical situations. Regularly test the panic function to confirm it works correctly. This feature is essential for quickly alerting authorities and ensuring help arrives promptly in emergency scenarios‚ providing an added layer of security and peace of mind.

6.2 Manual Fire Alarms and Emergency Procedures

The Concord 4 system allows manual activation of fire alarms through designated keys on the keypad or touchpad. Pressing the fire emergency button or entering the code (e.g.‚ 2 + user code) triggers the alarm‚ activating sirens and sending alerts to monitoring services if enabled. In the event of a fire‚ ensure all occupants evacuate the premises following the established emergency evacuation plan. Secure all doors and windows to prevent re-entry. After evacuation‚ account for all individuals at a designated safe location. Regular testing of the fire alarm system is recommended to ensure proper functionality. Refer to the manual for detailed instructions on testing and maintaining the fire alarm system. Always follow local fire safety regulations and guidelines for emergency preparedness.

Troubleshooting Common Issues

Identify and resolve system errors‚ beeps‚ or unexpected behavior by checking the event buffer and using diagnostic tools. Regular maintenance and manual reviews help ensure system reliability and functionality.

7.1 Resolving System Errors and Alarms

To address system errors or unexpected alarms‚ first review the event buffer for detailed logs of recent activities and system status. Common issues include low battery warnings‚ faulty sensors‚ or communication failures. Check the touchpad display for error codes‚ which provide specific insights into the problem. For example‚ pressing 1‚ 2‚ or *3 can help identify the source of an alarm. Ensure all doors and windows are secure and test sensors to confirm proper functionality. If issues persist‚ refer to the troubleshooting section in the manual or contact your installer for assistance. Regular system checks and updates can prevent recurring errors. Always record error codes for faster resolution.

7.2 Diagnostic Tools and Maintenance Tips

The Concord 4 system offers advanced diagnostic tools to ensure optimal performance. Regularly update software and firmware to access new features and security patches. Use the event buffer to monitor system activities and identify trends‚ while the system status screen provides real-time updates. Perform routine checks on sensors and wiring to prevent false alarms. Clean touchpads and keypads to maintain responsiveness. Schedule periodic professional maintenance to inspect and replace batteries‚ ensuring uninterrupted operation. Additionally‚ review user codes and access levels to maintain security integrity. Keep the system manual handy for quick reference during troubleshooting. Regular maintenance ensures your security system remains reliable and efficient‚ safeguarding your property and loved ones effectively. Always follow manufacturer guidelines for best results.

System Maintenance and Upkeep

Regular system maintenance ensures optimal performance. Update software and firmware‚ inspect sensors‚ and clean touchpads. Follow manufacturer guidelines to keep your Concord 4 system reliable and secure.

8.1 Regular Maintenance Requirements

Regular maintenance is crucial for ensuring the Concord 4 system operates efficiently. Users should inspect all sensors and connections monthly to prevent malfunctions. Clean the touchpad regularly to maintain responsiveness. Test all panic buttons and emergency functions quarterly. Ensure backup batteries are checked every six months and replaced as needed. Update software and firmware promptly when new versions are released. Review event logs to identify potential issues early. Proper maintenance extends system lifespan and ensures reliable security. Always follow manufacturer guidelines for specific procedures and schedules.

8.2 Updating System Software and Firmware

Regular software and firmware updates are essential to ensure the Concord 4 system runs efficiently and securely. Always download updates from the official GE Security or UTC Fire & Security website. To update‚ connect the system to a computer using a USB cable or access the update feature via the touchpad. Follow on-screen instructions carefully to avoid interruptions. After updating‚ restart the system to apply changes. Keep the system up-to-date to benefit from new features‚ bug fixes‚ and enhanced security. Refer to the manual or manufacturer support for detailed guidance on performing these updates safely and effectively.

9.2 Where to Find Additional Support and Manuals

The Concord 4 User Manual provides essential guidance for optimal system use. For further assistance‚ refer to the official GE Security website or contact support.

gentleman’s guide to vice and virtue

The Gentleman’s Guide to Vice and Virtue is a captivating tale of self-discovery, blending wit, romance, and adventure across 1700s Europe, exploring themes of identity, morality, and love.

1.1 Defining Vice and Virtue in the Context of a Gentleman

In the 18th-century European setting of The Gentleman’s Guide to Vice and Virtue, vice and virtue are explored through the lens of societal expectations and personal morality. Vice, often associated with indulgence and excess, is portrayed through characters like Monty, who embodies a life of pleasure and rebellion. Virtue, on the other hand, is represented by traits such as honor, respect, and self-control, often exemplified by figures who adhere to societal norms. The novel highlights the fine line between these two concepts, showing how they shape identity and relationships. Through its witty and romantic narrative, the book challenges the reader to reflect on what it means to balance vice and virtue in a world of contradictions.

1.2 The Concept of a Gentleman in Historical and Modern Perspectives

The concept of a gentleman has evolved significantly over time, reflecting shifting societal values. Historically, a gentleman was defined by wealth, lineage, and adherence to strict codes of conduct, emphasizing refinement, respectability, and honor. In the 18th century, as depicted in The Gentleman’s Guide to Vice and Virtue, being a gentleman meant navigating a complex web of social expectations, often tied to privilege and responsibility. In modern times, the term has broadened to encompass qualities like empathy, inclusivity, and personal integrity, moving beyond traditional class boundaries. Today, being a gentleman is less about societal status and more about how one treats others, blending timeless virtues with contemporary values. This evolution highlights the enduring relevance of the gentleman ideal in adapting to changing worlds.

1.3 The Purpose of a Guide to Navigating Vice and Virtue

The purpose of a guide to navigating vice and virtue is to provide a roadmap for individuals seeking balance between indulgence and integrity. Such a guide aims to help gentlemen understand the fine line between moral integrity and tempting vices, offering practical advice on making ethical decisions. By exploring historical and contemporary perspectives, it equips readers with the tools to cultivate virtuous traits while acknowledging human imperfections. The guide serves as a resource for self-reflection and growth, encouraging individuals to embody the qualities of a modern gentleman. Ultimately, its goal is to empower men to navigate life’s complexities with grace, ensuring that their actions align with their values and aspirations.

Historical Background of the Gentleman’s Code

The gentleman’s code originated in European society, emphasizing honor, etiquette, and moral conduct. Key figures like Casanova and Byron exemplified both vice and virtue, shaping its evolution.

2.1 The Origins of the Gentleman’s Code in European Society

The gentleman’s code traces its roots to medieval Europe, where chivalry and courtly manners laid the foundation. By the 18th century, it evolved into a set of unwritten rules governing behavior, emphasizing honor, loyalty, and refinement. This code was deeply influenced by the aristocracy and the emerging middle class, who sought to distinguish themselves through polite society. Key aspects included respect for social hierarchies, adherence to etiquette, and the pursuit of intellectual and cultural refinement. The code also encompassed moral expectations, such as honesty and respect for others, which were seen as essential for maintaining a gentleman’s reputation and standing in society. Over time, these principles became synonymous with the ideal of gentlemanly conduct.

2.2 Key Historical Figures Who Embodied Vice and Virtue

Historical figures like Giacomo Casanova and Albert Schweitzer embody the duality of vice and virtue. Casanova, known for his lavish lifestyle and numerous affairs, exemplified vice, while Schweitzer, a humanitarian and theologian, personified virtue. These individuals highlight the contrasting ideals of the gentleman’s code. Casanova’s hedonism clashed with societal norms, while Schweitzer’s selflessness aligned with moral expectations. Their lives illustrate how the balance between vice and virtue has shaped societal perceptions of gentlemanly conduct. Such figures remind us that the gentleman’s code is not rigid but adaptable, reflecting the complexities of human behavior across time and culture.

2.3 The Evolution of the Gentleman’s Code Through the Centuries

The gentleman’s code has undergone significant transformations over the centuries, reflecting shifting societal values and cultural norms. In medieval times, the code centered on chivalry and honor, while the Renaissance emphasized refinement and intellectual pursuits. By the 18th century, the code incorporated moral and social responsibility, with gentlemen expected to uphold ethical standards. The 19th century saw a rise in strict social etiquette, while the 20th century shifted toward personal integrity and respect for diversity. Today, the code balances tradition with modern ideals of equality and inclusivity. This evolution highlights how the gentleman’s code adapts to societal changes while maintaining core principles of respect, integrity, and dignity.

Understanding Vice and Virtue in Modern Times

In modern society, vice and virtue are redefined by evolving moral standards, personal freedom, and societal expectations, emphasizing balance, diversity, and ethical responsibility in contemporary life.

3.1 The Modern Interpretation of Vice in Society

In contemporary society, vice is often viewed through the lens of personal freedom and societal norms. Modern interpretations emphasize individual choice, with vice seen as behaviors that deviate from accepted standards but are not inherently harmful. The lines between vice and virtue blur as society becomes more accepting of diversity and alternative lifestyles. For instance, what was once considered a vice, such as non-traditional relationships, is now increasingly normalized. This shift reflects a broader cultural movement toward inclusivity and self-expression. However, societal expectations still play a significant role in defining vice, particularly when actions impact others negatively. Balancing personal desires with ethical responsibility remains a key challenge in navigating modern interpretations of vice and virtue.

3.2 Virtue in the 21st Century: What It Means to Be Virtuous

In the 21st century, virtue is often defined by qualities such as empathy, kindness, and integrity. It encompasses actions that promote the well-being of others and contribute positively to society. Modern interpretations emphasize the importance of self-awareness, inclusivity, and ethical decision-making. Virtue is not just about adhering to traditional moral codes but also about embracing diversity and standing up for justice. Traits like honesty, resilience, and compassion are highly valued, as they foster trust and harmony in personal and professional relationships. The concept of virtue has evolved to include environmental consciousness and social responsibility, reflecting the changing needs of a globalized and interconnected world. Being virtuous today means striving to make a positive impact while staying true to one’s values and principles.

3.3 The Balance Between Vice and Virtue in Contemporary Life

Finding the balance between vice and virtue in modern life is a delicate task. While virtues like honesty and kindness are essential, vices such as indulgence or ambition can also drive creativity and progress. Many people navigate this balance by setting personal boundaries and reflecting on their actions. For example, enjoying a vice like social drinking can be harmless if done moderately, but it can become destructive if it leads to addiction. Similarly, ambition is a vice when it prioritizes success over ethics but can be virtuous when it fuels innovation. The key is self-awareness and understanding how each choice impacts oneself and others. Striking this balance is crucial for maintaining personal integrity and fostering positive relationships in today’s fast-paced world.

The Role of Morality and Ethics

Morality and ethics serve as guiding principles for a gentleman, shaping decisions that define character and reputation, ensuring actions align with virtue and societal expectations.

4.1 The Importance of Moral Compass in Decision-Making

A moral compass is essential for guiding decisions, helping gentlemen navigate complex situations with integrity. It ensures actions align with ethical standards, fostering trust and respect in personal and social realms.

4.2 Ethical Dilemmas Faced by Modern Gentlemen

Modern gentlemen encounter ethical dilemmas that challenge their character, such as balancing ambition with empathy and navigating societal pressures while staying true to personal values. These situations require thoughtful reflection and integrity to resolve honorably.

4.3 The Impact of Moral Choices on Personal and Social Reputation

Moral choices significantly influence a gentleman’s personal and social reputation, shaping trust, respect, and relationships. Ethical decisions foster integrity, while unethical ones can erode credibility and damage social standing. In contemporary society, where actions are often scrutinized, maintaining a strong moral compass is essential to uphold one’s reputation and inspire confidence in others. The consequences of moral choices resonate deeply, reflecting a gentleman’s character and values in both personal and public spheres.

Social Etiquette and Behavior

A gentleman’s refined behavior in social settings reflects grace, respect, and cultural adaptability, ensuring harmonious interactions and maintaining a reputation of integrity and charm in diverse company.

5.1 The Rules of Social Etiquette for Gentlemen

Social etiquette for gentlemen revolves around respect, punctuality, and adaptability. A true gentleman ensures courteous behavior, listens actively, and avoids interrupting others. Respect for cultural norms is essential, whether in formal dinners or casual gatherings; Punctuality reflects reliability and consideration for others’ time. Dressing appropriately for the occasion is a hallmark of refinement. Table manners, such as using utensils correctly and waiting for everyone to be served, demonstrate breeding. Clear and polite communication, avoiding coarse language, fosters positive interactions. A gentleman also navigates social hierarchies gracefully, showing deference without compromising his dignity. These rules, rooted in tradition, evolve with modern sensibilities, ensuring a gentleman remains a paragon of decency and charm in any setting.

5.2 Navigating Social Hierarchies with Grace and Dignity

Navigating social hierarchies requires a gentleman to balance respect with self-assuredness. Understanding one’s place while treating others with equal dignity ensures smooth interactions. A gentleman adapts to diverse social settings, showing deference without compromising his values. He remains humble yet confident, avoiding pretentiousness. Emotional intelligence allows him to read rooms and respond appropriately, fostering harmony. Respectful communication, regardless of others’ status, builds trust and rapport. A true gentleman stays authentic, navigating hierarchies with grace, ensuring his actions reflect integrity and kindness. This approach earns admiration and maintains a reputation of decency in all social circles.

5.3 The Art of Communication in Social Settings

Effective communication is a cornerstone of a gentleman’s social prowess. It involves active listening, clarity in expression, and adaptability to diverse conversational dynamics. A gentleman speaks with confidence yet humility, ensuring his words are thoughtful and engaging. He navigates discussions with empathy, respecting differing opinions while maintaining his own stance. Understanding the audience and context allows him to tailor his communication style, fostering meaningful connections. Authenticity is key; a gentleman avoids pretense, ensuring his interactions are genuine and sincere. By mastering these elements, he excels in social settings, building rapport and leaving a lasting positive impression.

Vices and Temptations

Vices and Temptations explores the allure and consequences of indulgence, tracing Monty’s journey through 1700s Europe’s decadent underbelly, where pleasure and recklessness collide, shaping his volatile character.

6.1 Common Vices and Their Impact on a Gentleman’s Life

In the 18th century, vices such as gambling, overindulgence in alcohol, and illicit affairs were prevalent among gentlemen, often leading to financial ruin and social disgrace. These vices, while thrilling in the moment, frequently resulted in strained relationships, tarnished reputations, and personal turmoil. The protagonist, Monty, exemplifies this struggle, as his pursuit of pleasure and disregard for societal norms threatens to undermine his Grand Tour and family legacy. The novel highlights how unchecked vices can erode self-control and dignity, underscoring the importance of balance and self-awareness in navigating life’s temptations. By exploring these themes, the book offers a vivid portrayal of how vices can shape—and sometimes destroy—a gentleman’s life.

6.2 The Role of Temptation in Shaping Character

Temptation plays a pivotal role in shaping the character of a gentleman, as it reveals his moral resilience and capacity for growth. In The Gentleman’s Guide to Vice and Virtue, the protagonist, Monty, is repeatedly tested by desires that challenge his sense of self and purpose. Through his experiences, the novel illustrates how succumbing to temptation can lead to both personal disillusionment and unexpected self-discovery. Conversely, resisting temptation fosters integrity and self-awareness, essential traits for a gentleman. The interplay between vice and virtue highlights the complexity of human nature, showing that character is often forged in the fire of temptation. This duality underscores the importance of mindful choices in navigating life’s moral ambiguities.

6.3 Strategies to Manage and Overcome Destructive Vices

Overcoming destructive vices requires a combination of self-awareness, discipline, and strategic approaches. Recognizing triggers and understanding the root causes of vice is the first step toward change. Implementing mindfulness practices can help individuals remain present and make conscious decisions. Setting clear boundaries and seeking accountability from trusted individuals or mentors can also provide structure. Gradual behavior modification, rather than abrupt changes, often leads to sustainable results. Additionally, redirecting energy toward positive pursuits and cultivating a sense of purpose can diminish the appeal of vice. Ultimately, the journey to overcome destructive tendencies is a continuous process of growth, requiring patience, resilience, and a commitment to personal betterment.

Virtues and Their Cultivation

Virtues are the essence of a gentleman’s character, cultivated through empathy, integrity, and self-discipline. Key virtues include honesty, kindness, and resilience, fostering a balanced, esteemed life.

7.1 Key Virtues Every Gentleman Should Aspire To

A true gentleman embodies a set of timeless virtues that define his character and guide his actions. Among these, empathy stands as a cornerstone, allowing him to understand and respect the feelings of others. Integrity is another pivotal virtue, ensuring his words and deeds align with moral principles. Humility, too, is essential, fostering modesty and a lack of pretense. Self-awareness enables him to recognize his flaws and strive for improvement. Courage, both in standing up for what is right and facing challenges, is integral to his identity. Lastly, kindness and generosity cultivate meaningful connections and a reputation for compassion. These virtues collectively shape a gentleman’s journey toward moral excellence and societal impact.

7.2 The Importance of Self-Awareness and Self-Improvement

Self-awareness is the foundation of personal growth, enabling a gentleman to recognize his strengths, weaknesses, and motivations. By fostering introspection, he gains clarity on his values and aspirations, aligning his actions with a higher purpose. Self-improvement, as a continuous journey, encourages him to refine his character, overcoming vices and embracing virtues. This mindset cultivates resilience, adaptability, and a commitment to lifelong learning. Through self-awareness, a gentleman can navigate societal expectations while remaining true to himself, fostering integrity and authenticity. Ultimately, self-improvement empowers him to become the best version of himself, leaving a positive impact on those around him and society at large.

7.3 Practical Steps to Cultivate Virtuous Traits

Cultivating virtuous traits requires intentional effort and consistent practice. Start by setting clear, personal goals aligned with virtues like honesty, empathy, and humility. Engage in daily reflections to assess your actions and identify areas for improvement. Practice mindfulness to stay present and aware of your emotions and reactions. Surround yourself with role models who embody the virtues you aspire to, and seek feedback from trusted individuals. Incorporate habits such as gratitude journaling, acts of kindness, and ethical decision-making into your routine. Lastly, embrace accountability and learn from mistakes, using them as opportunities for growth. Over time, these practices will help integrate virtuous traits into your character, fostering a life of integrity and purpose.

The Gentleman’s Guide to Vice and Virtue masterfully explores the balance between vice and virtue, offering a journey of self-discovery, love, and morality set against a vibrant 18th-century backdrop, resonating today as a timeless tale of growth and redemption.

8.1 The Blurred Lines Between Vice and Virtue

The distinction between vice and virtue often fades under scrutiny, revealing a complex interplay of human nature. In The Gentleman’s Guide to Vice and Virtue, this duality is vividly portrayed through Monty’s journey. His pursuit of pleasure coexists with a deeper quest for connection, showing how societal expectations of virtue can clash with personal desires. The novel illustrates that neither vice nor virtue exists in isolation; they are intertwined, shaped by context and perspective. This nuanced exploration challenges readers to question rigid moral frameworks, embracing instead a more fluid understanding of human behavior and the multifaceted nature of our choices.

8.2 The Relevance of the Gentleman’s Guide in Modern Society

The Gentleman’s Guide to Vice and Virtue remains remarkably relevant in today’s society, offering timeless insights into identity, morality, and love. Its exploration of diverse characters, including LGBT+ individuals, resonates with modern values of inclusivity and acceptance. The novel’s historical backdrop provides a mirror to contemporary discussions on gender, sexuality, and societal expectations, highlighting how human experiences transcend time. By blending humor, romance, and self-discovery, the book appeals to a broad audience, encouraging reflection on personal growth and the balance between vice and virtue in our own lives. Its universal themes ensure its continued resonance in an ever-evolving world.

8.3 Final Thoughts on Mastering the Art of Being a Gentleman

Mastering the art of being a gentleman is a journey of self-awareness, balance, and growth. It involves embracing both virtue and vice, understanding their roles in shaping character. A gentleman navigates societal expectations with grace, fostering meaningful connections and inclusivity. The novel highlights the importance of moral integrity, empathy, and adaptability in modern times. By reflecting on historical and contemporary values, one can cultivate a timeless sense of gentlemanly conduct, ensuring relevance and respect in any era. Ultimately, being a gentleman is about continuous self-improvement, embodying virtues while acknowledging human imperfections, and striving to make a positive impact in the world.

understanding art 11th edition pdf

The 11th Edition of Understanding Art by Lois Fichner-Rathus offers a comprehensive exploration of art elements, principles, and history․ It features Theory & Practice, Art Tours, and digital resources like MindTap, providing students with a robust toolkit to analyze and appreciate art across cultures and time․

1․1 Overview of the 11th Edition

The 11th Edition of Understanding Art offers a fresh, balanced approach to art appreciation, incorporating a wide range of artistic styles and periods․ It features expanded sections on religious and world art, graphic design, and conceptual art, along with a new Art Tour of Los Angeles․ Over 100 new images and enhanced digital resources, including MindTap, provide students with a comprehensive toolkit for analyzing and understanding art across cultures and historical contexts․

1․2 Importance of Art Appreciation

Art appreciation is essential for fostering critical thinking, cultural understanding, and creativity․ It allows individuals to connect with diverse perspectives, historical contexts, and creative expressions․ The 11th Edition of Understanding Art enhances this journey by providing tools like Theory & Practice and Art Tours, helping students engage deeply with artworks․ This appreciation not only enriches personal experiences but also promotes a lifelong understanding and enjoyment of art, fostering a more visually and culturally aware society․

1․3 Structure of the Textbook

The Understanding Art, 11th Edition textbook is structured to provide a comprehensive and balanced approach to art education․ It is divided into chapters that explore the elements and principles of art, art history, and critical analysis․ Special features such as Theory & Practice and Art Tours enhance learning, while expanded sections on global perspectives and digital resources like MindTap offer additional support․ This organized framework ensures a deep and engaging understanding of art for students and enthusiasts alike․

Elements of Art

The elements of art—line, shape, space, value, form, texture, and color—are the building blocks of artistic expression, providing the foundation for creating and analyzing visual compositions effectively․

2․1 Line

Line is a fundamental element of art, defined as a continuous mark made on a surface by a drawing tool․ It can vary in direction, thickness, and continuity, creating dynamic effects․ Artists use lines to suggest movement, define shape, and create rhythm․ Horizontal lines often convey stability, while vertical lines can express power․ Diagonal lines introduce tension and energy․ Lines can also guide the viewer’s eye through a composition, emphasizing form and structure; Understanding line is essential for analyzing and creating effective visual art․

2․2 Shape

Shape is a self-contained area with height, width, and depth, created by lines or other elements․ It can be geometric, like squares or circles, or organic, resembling natural forms․ Shapes convey meaning and emotion, often guiding the viewer’s eye․ They can suggest stability, movement, or complexity․ Artists use shapes to create balance, harmony, or tension in compositions․ Understanding shape enhances the ability to interpret and create visually compelling works of art, exploring its role in form and structure․

2․3 Space

Space refers to the sense of depth, distance, or three-dimensional quality in a work of art․ It can be actual or illusory, created through techniques like perspective, overlapping, or size progression․ Positive space is occupied by objects, while negative space is the unoccupied area around them․ Artists use space to guide the viewer’s eye, create mood, or suggest movement․ Understanding space enhances composition and visual storytelling, allowing artists to manipulate depth and perception effectively in their works․

2․4 Value

2․5 Form

Form in art refers to three-dimensional objects or shapes that occupy space․ It is created through the use of line, value, and texture, giving the illusion of mass and volume․ Artists achieve form by suggesting contours, shading, and layering․ The perception of form is enhanced by light and shadow, which define the object’s structure․ In the 11th Edition of Understanding Art, form is explored as a key element that engages the viewer’s spatial awareness and contributes to the overall composition’s depth and realism․

2․6 Texture

Texture in art refers to the surface quality of an object, either real or implied․ It can be tactile, inviting touch, or visual, creating an illusion of surface characteristics․ Artists use texture to add depth, emotion, and complexity to their work․ The 11th Edition of Understanding Art explores how texture interacts with other elements like color and form, enhancing the viewer’s engagement with the artwork․ This element is crucial for creating dynamic and visually appealing compositions․

2․7 Color

Color is a powerful element in art, conveying emotion, energy, and meaning․ It can be used to create harmony, contrast, or emphasis․ The 11th Edition of Understanding Art delves into color theory, exploring primary and secondary colors, warm and cool tones, and the psychological effects of color․ Artists manipulate color to evoke feelings and guide the viewer’s eye․ This element is essential for creating dynamic compositions and enhancing the visual impact of a work of art․

Principles of Art

The principles of art guide artists in creating balanced, harmonious, and meaningful compositions․ They include balance, contrast, emphasis, movement, pattern, unity, and proportion, enhancing visual appeal and expression․

3․1 Balance

Balance in art refers to the distribution of visual elements to create stability and harmony․ It can be achieved through symmetrical or asymmetrical arrangements․ Symmetrical balance mirrors elements, while asymmetrical balance uses contrasting elements to create equilibrium․ This principle guides artists in organizing compositions, ensuring no single part overwhelms the viewer․ The 11th Edition of Understanding Art explores balance in various artistic styles, helping students analyze and appreciate its role in creating aesthetically pleasing works․ This concept is vital for understanding how artists convey meaning and emotion through composition․

3․2 Proportion

Proportion in art refers to the relationship between the sizes of different parts of a composition․ It creates harmony by guiding the viewer’s eye and establishing hierarchy․ Correct proportion ensures that elements are scaled appropriately, while exaggerated or altered proportions can create specific effects or emphasize certain themes․ The 11th Edition of Understanding Art highlights how proportion contributes to the balance and emotional impact of artworks, helping students interpret and analyze compositions effectively․ This principle is essential for understanding artistic structure and meaning․

3․3 Emphasis

Emphasis in art directs the viewer’s attention to a specific part of the composition, creating a focal point․ This principle is achieved through various techniques, such as color contrast, size, or placement․ The 11th Edition of Understanding Art explains how emphasis guides the viewer’s eye and communicates the artist’s intent․ By isolating or accentuating elements, emphasis enhances the emotional and visual impact of a work, making it a crucial tool for effective artistic communication and engagement․ This concept is explored in depth with practical examples․

3․4 Movement

Movement in art creates a sense of motion or energy, engaging the viewer’s eye․ Techniques like diagonal lines, gesture, and blurred forms convey dynamism․ The 11th Edition of Understanding Art explores how movement guides the viewer through a composition, evoking emotions and storytelling․ Artists use movement to capture the essence of action or rhythm, making their works visually dynamic and thought-provoking․ This principle enhances the expressive and interactive qualities of art, connecting the audience to the artist’s vision․

3․5 Pattern

Pattern in art involves the repetition of shapes, lines, or colors to create a rhythmic or decorative effect․ It adds texture and visual interest, engaging the viewer’s eye․ Patterns can be natural, like waves, or abstract, like geometric designs․ The 11th Edition of Understanding Art highlights how patterns convey meaning and emotion, transforming compositions into dynamic and thought-provoking works․ This principle enriches the visual language of art, offering endless creative possibilities for artists and designers․

3․6 Unity

Unity in art refers to the cohesive arrangement of elements and principles that create a harmonious whole․ It ensures all parts of a composition work together to convey a single, unified message․ Achieved through consistency in line, shape, color, and space, unity engages the viewer and directs their attention․ In the 11th Edition of Understanding Art, Lois Fichner-Rathus emphasizes how unity strengthens the emotional and visual impact of a artwork, fostering a deeper connection with the audience․

Art History and Context

The 11th Edition explores art history chronologically and geographically, highlighting cultural influences and religious impacts․ It connects artworks across time and place, enriching contextual understanding and appreciation․

4․1 Chronological Development

The 11th Edition of Understanding Art traces the evolution of art historically, from ancient to contemporary periods․ It provides a detailed journey through key art movements, styles, and cultural shifts, offering insights into how artistic practices have developed over time․ The textbook includes beautifully reproduced images and contextual narratives, enabling readers to understand the progression of artistic ideas and their significance within specific historical frameworks․ This chronological approach helps students appreciate the dynamic nature of art and its continuous transformation across centuries․

4․2 Geographical and Cultural Influences

Understanding Art, 11th Edition, highlights the profound impact of geography and culture on artistic expression․ It explores how diverse regions and cultures, such as African, Asian, European, and Indigenous traditions, have shaped unique art forms and styles․ The textbook emphasizes how environmental factors, cultural beliefs, and historical contexts influence artistic themes, techniques, and mediums․ This section provides a global perspective, showcasing the rich diversity of art across the world and its cultural significance․

4․3 Religious and World Art

Understanding Art, 11th Edition, delves into the significant role of religion and global cultures in shaping artistic traditions․ It examines how religious beliefs have inspired iconic works across various faiths, including Christian, Buddhist, Islamic, and Indigenous art․ The textbook explores the symbolic themes, rituals, and cultural practices that have influenced art forms worldwide․ This section highlights the diversity of religious art and its enduring impact on global artistic expression and cultural identity․

Special Features of the 11th Edition

The 11th Edition of Understanding Art includes new and expanded sections on religious and world art, green buildings, graphic design, and conceptual art․ It features a new Art Tour for Los Angeles and over 100 new images, enhancing the learning experience with fresh perspectives and digital resources like MindTap․

5․1 Theory & Practice

The Theory & Practice feature in the 11th Edition of Understanding Art provides a unique opportunity to observe the artist’s creative process from start to finish․ This section enables students to think critically about works of art in relation to one another, fostering a deeper understanding of artistic techniques and concepts․ By combining theoretical insights with practical examples, it bridges the gap between analysis and application, making complex art principles more accessible and engaging for learners․ This feature is designed to enhance both critical thinking and creative skills․

5․2 Art Tours

The Art Tours feature in the 11th Edition of Understanding Art offers a unique learning experience by transporting students to museums and monuments worldwide․ This section includes a new Art Tour for Los Angeles, among others, providing a virtual exploration of iconic artworks in their original contexts․ Through detailed descriptions and high-quality images, students can visualize and connect with masterpieces, enhancing their understanding of art history and cultural significance in an engaging and immersive way․ This feature makes global art accessible to everyone․

5․3 Expanded Sections

The 11th Edition of Understanding Art features expanded sections on diverse topics, including religious and world art, green buildings, graphic design, and conceptual art․ These additions provide a broader perspective on artistic expressions, ensuring comprehensive coverage of both traditional and contemporary art forms․ Over 100 new images and a new Art Tour for Los Angeles further enrich the learning experience, offering students a deeper understanding of global artistic traditions and cultural influences․ This edition is designed to cater to a wide range of interests and learning styles, making it an invaluable resource for art enthusiasts and students alike․

Digital Resources

MindTap for Understanding Art offers a dynamic digital experience with interactive learning tools, quizzes, and access to the full textbook online, enhancing engagement and study․

6․1 MindTap for Understanding Art

MindTap for Understanding Art is a dynamic digital learning platform designed to enhance student engagement․ It offers interactive activities, flashcards, and quizzes to reinforce key concepts․ With personalized study plans and progress tracking, students can focus on areas needing improvement․ Accessible on multiple devices, MindTap ensures flexibility for modern learners․ Customizable notifications and assignments further tailor the experience․ This resource also provides access to the full textbook online, enriching the learning journey for both students and instructors․

6․2 Interactive Learning Tools

The 11th Edition of Understanding Art includes interactive learning tools designed to deepen engagement with art concepts․ These tools feature flashcards, quizzes, and simulations that help students visualize and apply their knowledge․ Interactive timelines and virtual gallery tours enhance understanding of artistic movements and cultural contexts․ Additionally, these tools allow students to explore case studies and analyze artworks in detail, fostering a more dynamic and immersive learning experience tailored to diverse learning styles․

6․4 Accessing the Full Textbook Online

The 11th Edition of Understanding Art is available in its entirety online, offering convenient access to its comprehensive content․ Students can access the full textbook through the publisher’s platform or via MindTap, the digital learning solution․ The online version includes beautifully reproduced images, interactive features, and supplementary materials, ensuring a seamless and engaging learning experience․ This digital accessibility allows users to study anytime, anywhere, while retaining all the richness of the print edition․

Author Background

Lois Fichner-Rathus, a professor at The College of New Jersey, holds a Ph․D․ in Art History from MIT and an M․A․ from Williams College․ She has taught art history for over 30 years, contributing significantly to art education through her academic and literary work․

7․1 Lois Fichner-Rathus

Lois Fichner-Rathus is a renowned professor of art at The College of New Jersey, specializing in art history and education․ She holds a Ph․D․ in the History, Theory, and Criticism of Art from MIT and an M․A․ from Williams College․ Her academic credentials and extensive teaching experience have made her a leading voice in art education, contributing to the development of Understanding Art as a comprehensive resource for students worldwide․

Her work emphasizes critical thinking and cultural context, making art accessible to diverse learners․ Fichner-Rathus’s expertise spans various art historical periods and cultural traditions, enriching the textbook with balanced and insightful perspectives․

7․2 Academic Credentials

Lois Fichner-Rathus holds a combined undergraduate degree in fine arts and art history․ She earned an M․A․ from Williams College Graduate Program in the History of Art and a Ph․D․ in the History, Theory, and Criticism of Art from the Massachusetts Institute of Technology․ Her academic background provides a strong foundation for her expertise in art history and education, making her a credible authority in the field of visual arts and art appreciation․

7․3 Contributions to Art Education

Lois Fichner-Rathus has significantly impacted art education through her teaching and authorship of Understanding Art․ Her work emphasizes critical thinking and cultural context, making art accessible to diverse learners․ The 11th Edition introduces features like Theory & Practice and Art Tours, enhancing student engagement․ Her contributions have shaped art education by providing comprehensive, visually rich resources that foster a deeper appreciation and understanding of art across cultures and historical periods․

Critical Thinking and Analysis

Understanding Art encourages students to engage deeply with artworks through structured analysis, fostering interpretative skills and contextual understanding to evaluate artistic significance effectively․

8․1 Approaches to Art Analysis

The 11th Edition of Understanding Art equips students with diverse methods for analyzing artworks, emphasizing both formal and contextual approaches․ By exploring elements like line, shape, and color, as well as historical and cultural contexts, readers gain a comprehensive framework for interpretation․ The textbook encourages critical thinking through structured analysis, enabling students to evaluate artistic significance and meaning effectively․ This balanced approach fosters a deeper understanding of art as a reflection of human experience and cultural identity․

8․2 Contextual Interpretation

Contextual interpretation in Understanding Art involves analyzing artworks within their historical, cultural, and social frameworks․ This approach emphasizes understanding the artist’s intent, the era’s influences, and the cultural significance of the piece․ By examining the context, readers gain deeper insights into the artwork’s meaning and relevance․ The textbook provides tools like Art Tours and expanded sections on religious and world art, enabling students to connect works with their broader cultural and historical landscapes effectively․

8․3 Evaluating Artistic Value

Evaluating artistic value involves analyzing a work’s creativity, emotional impact, and cultural significance․ Understanding Art guides readers in applying critical criteria, such as technical skill, originality, and relevance, to assess artworks․ The textbook encourages considering the artist’s intent, historical context, and audience reception․ By fostering a deeper understanding of these elements, the 11th Edition helps readers develop a nuanced approach to evaluating art’s aesthetic and cultural value effectively and thoughtfully․

Art Across Cultures

Art Across Cultures explores global perspectives, revealing how diverse traditions reflect cultural values and inspire innovation․ This section highlights cross-cultural exchanges and their impact on artistic expression․

9․1 Global Perspectives

Understanding Art, 11th Edition offers a broad exploration of global art traditions, emphasizing cross-cultural influences and historical contexts․ This section examines how art reflects diverse cultural identities, traditions, and values, providing insights into the shared human experiences that unite global artistic expressions․ By analyzing works from various regions and time periods, readers gain a deeper appreciation for the richness of art across cultures and its role in shaping societies worldwide․

9․2 Cultural Significance of Art

Understanding Art, 11th Edition highlights the cultural significance of art as a reflection of societal values, traditions, and beliefs․ It explores how art preserves history, fosters cultural identity, and bridges diverse communities․ By examining artworks from various cultures, the textbook illustrates art’s role in expressing and shaping cultural norms, traditions, and spiritual practices․ This section emphasizes the importance of understanding art within its cultural context to appreciate its deeper meaning and global impact․

9․3 Cross-Cultural Influences

Understanding Art, 11th Edition examines the dynamic exchange of artistic styles and ideas across cultures․ It explores how global perspectives have shaped art historically and contemporarily, fostering innovation and cultural blending․ The textbook highlights examples of cross-cultural influences, such as the integration of motifs, techniques, and themes from diverse traditions․ This section emphasizes how these exchanges enrich artistic expression and broaden our understanding of art as a universal language, connecting cultures worldwide․

The Role of Art in Society

Art reflects society’s values and challenges, serving as a tool for change․ It appears in public spaces, fostering cultural engagement and inspiring social dialogue․ This section explores its impact․

10․1 Art as a Reflection of Society

Art mirrors societal values, capturing the spirit of different eras and cultures․ It reflects the collective consciousness, addressing social issues, cultural norms, and historical events․ Through various forms, art provides insight into the human experience, serving as a visual record of societal evolution․ The 11th Edition highlights how art communicates the complexities of human life, offering a lens to understand diverse perspectives and the cultural fabric of communities․ This reflection fosters empathy and understanding․

10․2 Art as a Tool for Social Change

Art has long been a powerful medium for driving social change, addressing inequalities, and inspiring action․ It provides a visual language to communicate ideas, challenge norms, and spark dialogue․ The 11th Edition emphasizes how artists use their work to advocate for justice, environmental awareness, and human rights․ Through murals, installations, and digital art, creativity becomes a catalyst for transformation, empowering individuals and communities to envision a better future and take collective action․

10․3 Art in Public Spaces

Art in public spaces enhances community engagement and accessibility, transforming urban environments into cultural landscapes․ Murals, sculptures, and installations foster a sense of identity and belonging․ The 11th Edition highlights how public art reflects societal values and challenges, making it a vital part of cultural dialogue․ Digital resources like MindTap offer interactive tools to explore these works, enabling deeper understanding of art’s role in shaping public spaces and inspiring community interaction and reflection․

Posted in PDF

nec phone manual user guides

NEC phone manuals provide comprehensive guides for setup, operation, and troubleshooting of NEC Univerge systems, including SV9100, SV8100, and SL2100 models, ensuring optimal user experience and functionality.

1.1 Overview of NEC Phone Systems

NEC phone systems, including the Univerge series, offer advanced communication solutions tailored for businesses of all sizes. Models like the SV9100, SV8100, and SL2100 provide robust features such as call management, voicemail, and customizable settings. These systems support both digital and IP phones, ensuring flexibility and scalability. Designed for ease of use, NEC phones feature intuitive interfaces with soft keys and interactive guides to navigate functions seamlessly. Whether for small offices or large enterprises, NEC systems deliver reliable performance, enhanced productivity, and advanced call handling capabilities. The manuals and user guides provide detailed instructions for installation, configuration, and troubleshooting, making them essential resources for optimizing system functionality. With a focus on innovation and user-centric design, NEC phone systems are widely recognized for their durability and versatility in meeting diverse communication needs.

1.2 Importance of User Manuals

NEC phone user manuals are essential for understanding and utilizing the full potential of NEC phone systems. They provide detailed step-by-step instructions for setup, operation, and troubleshooting, ensuring users can resolve issues independently. These guides are crucial for optimizing system performance, as they explain advanced features, customization options, and maintenance tips. By following the manual, users can avoid common mistakes, reduce downtime, and extend the lifespan of their devices. Additionally, manuals include safety precautions and regulatory compliance information, ensuring safe and legal operation. Whether you’re a novice or an experienced user, NEC phone manuals are indispensable resources for mastering your communication system and enhancing productivity. They serve as a one-stop solution for all your NEC phone-related needs, offering clarity and confidence in system management.

NEC Univerge Series User Guides

NEC Univerge series user guides offer detailed instructions for SV9100, SV8100, and SL2100 models, covering setup, features, troubleshooting, and customization to enhance communication efficiency and user experience.

2.1 NEC Univerge SV9100 User Guide

The NEC Univerge SV9100 User Guide provides detailed instructions for setting up and operating the SV9100 telephone system. It covers essential features such as making and receiving calls, call handling, and voicemail setup. The guide also includes step-by-step instructions for programming keys, configuring system settings, and troubleshooting common issues. Users can learn how to customize their phone experience by adjusting display settings, managing call parking, and utilizing advanced features like call diversion. The SV9100 User Guide is designed to help both new and experienced users navigate the system efficiently, ensuring optimal performance and productivity. Additional resources, such as tutorials and FAQs, are referenced to further assist users in mastering the SV9100’s capabilities.

2.2 NEC Univerge SV8100 User Guide

The NEC Univerge SV8100 User Guide is an essential resource for users to master the operation of their SV8100 phone system. It provides detailed instructions on setting up the system, configuring features, and troubleshooting common issues. The guide covers key functionalities such as voicemail management, call handling, and programmable keys, ensuring users can customize their experience. Additionally, it offers step-by-step guidance on advanced features like call parking, call diversion, and system updates. The SV8100 User Guide is designed to be user-friendly, catering to both new and experienced users. By following the guide, users can optimize their communication experience, streamline workflows, and maintain efficient system performance; This comprehensive manual ensures that users can fully utilize the capabilities of their NEC Univerge SV8100 system with confidence and ease.

2.3 NEC Univerge SL2100 User Guide

The NEC Univerge SL2100 User Guide is designed to help users navigate and optimize the features of the SL2100 communication system. It covers essential topics such as system installation, configuration, and troubleshooting, ensuring a smooth setup process. The guide provides detailed instructions on using key functionalities like call handling, voicemail, and programmable keys. It also explores advanced features such as call parking, forwarding, and system updates. The SL2100 User Guide emphasizes ease of use, catering to both novice and experienced users. By following the guide, users can maximize their communication experience, streamline workflows, and maintain optimal system performance. This comprehensive resource ensures that users can fully leverage the capabilities of their NEC Univerge SL2100 system with confidence and efficiency.

Installation and Setup

Ensuring a smooth setup process, NEC phone manuals provide detailed installation guides, covering hardware connections, software configurations, and essential compliance and safety standards for optimal functionality.

3.1 Setting Up Your NEC Phone System

Setting up your NEC phone system involves several key steps to ensure proper functionality. First, carefully unbox and inventory all components, including handsets, base units, and cables. Next, connect the hardware according to the diagram provided in the manual, ensuring all ports are securely linked. Power up the system and allow it to initialize. Use WebPro or PCPro for initial configuration, such as setting up extensions, voicemail, and call routing. Program programmable keys for frequently used features. Finally, test all functions to ensure everything operates smoothly. Always follow safety precautions and compliance guidelines outlined in the manual to avoid damage or interference. Proper setup ensures reliable performance and maximizes your phone system’s capabilities.

3.2 Initial Configuration Steps

Initial configuration steps for your NEC phone system begin with accessing the system’s web interface through a browser. Assign a static IP address to the system and set an administrator password for security. Configure date, time, and timezone settings to ensure synchronization across all devices. Next, set up extensions and user accounts, defining access levels and permissions. Activate voicemail services and assign mailboxes to users, ensuring proper message management. Configure call routing rules, such as hunt groups and forwarding options, to direct calls efficiently. Finally, test all configurations to confirm functionality. These steps ensure a secure and efficient setup, preparing your system for daily operations. Always refer to your NEC phone manual for detailed instructions specific to your model.

Basic Features of NEC Phones

NEC phones offer essential features like call making/receiving, hold, transfer, and call parking, ensuring seamless communication and efficient call management for daily operations.

4.1 Making and Receiving Calls

Making and receiving calls on NEC phones is straightforward. To initiate a call, lift the handset or press the speaker key, then dial the desired number using the keypad. For receiving calls, simply lift the handset or press the speaker key when the phone rings. The interactive user interface allows easy navigation through menus and call handling features. Use soft keys for shortcuts to functions like call hold, transfer, or park. Voicemail integration enables message management directly from the handset. Ensure proper setup and configuration for optimal performance. Refer to the user manual for detailed instructions on advanced call management and troubleshooting common issues. Regular maintenance, like cleaning the keypad and updating firmware, ensures reliability. Follow safety precautions and compliance guidelines for uninterrupted service.

4.2 Call Handling and Management

Call handling and management on NEC phones are designed to enhance productivity and streamline communication. Features such as call hold, transfer, and park enable users to manage multiple calls efficiently. The call park feature allows placing a call on hold and resuming it from another extension. Call transfer can be performed to redirect calls to other lines or extensions. The hold function temporarily pauses a call, giving users flexibility to handle other tasks. These features are easily accessible through the interactive user interface and soft keys, allowing for quick navigation and management. Additionally, voicemail integration allows users to manage messages directly from the handset. Proper setup and configuration ensure these features work seamlessly, enhancing overall call management capabilities and user experience.

Advanced Features of NEC Phones

NEC phones offer advanced features like voicemail setup, customizable settings, and call management tools, enabling users to enhance productivity and streamline communication efficiently.

5.1 Voicemail Setup and Usage

Setting up and using voicemail on NEC phones is straightforward, with guides providing step-by-step instructions. Users can record greetings, manage messages, and customize settings. Advanced features include email integration for message notifications and remote access. Troubleshooting tips are also available to resolve common issues, ensuring seamless communication. Proper configuration ensures efficient message management, enhancing productivity.

5.2 Customizing Phone Settings

Customizing your NEC phone settings allows you to personalize your communication experience. Users can adjust ring tones, display settings, and programmable keys to suit their preferences. The manual provides detailed steps for modifying these settings, ensuring ease of use. Advanced options include setting up call forwarding, do-not-disturb modes, and custom greetings. Additionally, users can manage their voicemail notifications and integrate with other systems for enhanced functionality. These customization options empower users to tailor their phone system to meet specific needs, improving efficiency and productivity. By following the guide, users can explore and implement these features seamlessly, ensuring their phone system aligns with their workflow and preferences.

Interactive User Guides

Interactive user guides provide visual and step-by-step instructions for navigating NEC phone systems, ensuring easy access to features like soft keys, call management, and display settings.

6.1 Navigating the User Interface

Navigating the user interface of NEC phones is straightforward, with intuitive menus and soft keys that provide quick access to features. The display screen offers a clear view of options, while soft keys below it change based on the active menu. Users can easily scroll through settings, call history, and advanced features using navigation keys. Customizable displays allow users to prioritize frequently used functions. The interface supports both digital and IP phone connections, ensuring compatibility across systems. For first-time users, the interactive guide helps familiarize them with key operations. Regular updates ensure the interface remains user-friendly and efficient. Referencing the manual or interactive guide can help users unlock all available features and settings for an enhanced experience.

6.2 Utilizing Soft Keys

Soft keys on NEC phones provide quick access to frequently used features, streamlining operations. Located below the display, these keys offer context-sensitive functions that change based on the current task. Users can program soft keys to suit their needs, such as setting up shortcuts for call forwarding, voicemail, or directory access. The manual details how to customize these keys using tools like WebPro or PCPro. Soft keys enhance efficiency, allowing users to navigate menus and activate features with minimal effort. Regular use of soft keys can significantly improve productivity. For optimal customization, refer to the user guide or interactive tutorials. Proper utilization of soft keys ensures a seamless and personalized phone experience.

Maintenance and Troubleshooting

Regularly clean your NEC phone and update firmware to ensure optimal performance. Refer to the manual for troubleshooting common issues like connectivity problems or failed calls.

7.1 Routine Maintenance Tips

Regular maintenance is essential to ensure your NEC phone system operates efficiently. Start by cleaning the handset and keypad with a soft cloth to prevent dust buildup. Always update the firmware to the latest version, as provided in the user manual, to enhance performance and security. Check for loose connections and secure all cables properly. Additionally, perform periodic backups of your voicemail and system settings to avoid data loss. Refer to the manual for specific instructions on how to reset or restore factory settings if needed. Finally, ensure power supplies are stable and protect your system from voltage fluctuations using a UPS. By following these tips, you can extend the lifespan of your NEC phone and maintain optimal functionality.

7.2 Common Issues and Solutions

Common issues with NEC phones include connectivity problems, distorted audio, and firmware glitches. For connectivity issues, ensure all cables are securely connected and restart the system. If audio quality is poor, clean the handset or replace it if damaged. Firmware updates often resolve software-related problems, so check the manual for update instructions. If calls drop frequently, check network settings or consult your IT specialist. For voicemail issues, verify password settings and ensure proper configuration. Refer to the user guide for troubleshooting specific error codes or messages. If problems persist, contact NEC support for professional assistance. Always follow safety precautions when handling electrical components. Regular maintenance and updates can prevent many of these issues, ensuring smooth operation of your NEC phone system.

Compliance and Safety

NEC phone systems comply with regulatory standards, ensuring safe and reliable operation. Adhere to safety precautions and warnings in the manual to prevent hazards and ensure environmental responsibility.

8.1 Regulatory Compliance Information

NEC phone systems are designed to meet regulatory standards, ensuring compliance with applicable laws and regulations. Devices comply with FCC Part 15 rules, and proper use is essential to maintain compliance. Compliance marking, such as an “X” on the nameplate, indicates adherence to specific conditions outlined in the manual. Users must follow all guidelines to ensure environmental responsibility and safety. Compliance ensures reliable performance and avoids potential legal issues. Always refer to the manual for detailed compliance information and specifications. Adhering to these standards guarantees optimal functionality and sustainability of NEC phone systems. Regulatory compliance is a priority for NEC, ensuring products meet global safety and environmental requirements. By following the manual’s guidelines, users can ensure compliance and maintain product integrity. Compliance is non-negotiable for proper device operation and user safety.

8.2 Safety Precautions and Warnings

Adhering to safety precautions is crucial when using NEC phone systems to ensure user safety and device longevity. Avoid exposing the phone to water or extreme temperatures, as this can cause permanent damage. Use only approved chargers and accessories to prevent electrical hazards. Keep the device out of reach of children to avoid accidental damage or misuse. Follow proper disposal guidelines for batteries and electronic components to minimize environmental impact. Do not attempt to repair the phone yourself; contact authorized service personnel for any maintenance. Always read and follow the safety instructions provided in the manual to ensure safe operation. Failure to comply with these precautions may void the warranty or pose risks to user safety. Proper handling and care are essential for optimal performance and longevity of NEC phones.

Additional Resources

Explore NEC’s official website for tutorials, FAQs, and downloadable guides to enhance your phone system experience. Visit the support section for detailed troubleshooting and setup assistance.

9.1 Tutorials and How-To Guides

NEC offers a variety of tutorials and how-to guides to help users master their phone systems. These resources include step-by-step instructions for setting up voicemail, configuring programmable keys, and navigating the user interface. Video tutorials are also available for visual learners, covering topics like call handling and advanced features. The guides are model-specific, ensuring relevance for systems like the SV9100, SV8100, and SL2100. Users can access these materials on NEC’s official website or through their support portal. Additionally, interactive guides provide hands-on practice, allowing users to explore features in a simulated environment. These tools are designed to empower users with the knowledge needed to optimize their phone system’s performance and functionality. For more detailed assistance, visit the NEC support section.

9.2 Frequently Asked Questions

NEC phone systems come with extensive FAQ sections to address common user queries. These include troubleshooting tips for issues like call connectivity, voicemail setup, and programmable key configurations. FAQs also cover basic operations, such as making calls, using speakerphone, and managing call parking. Model-specific questions for systems like the SV9100, SV8100, and SL2100 are included, ensuring users find relevant solutions. Additional topics include software updates, compatibility with accessories, and compliance with safety standards. The FAQs are available on NEC’s official support portal and in downloadable PDF formats. They provide quick answers to everyday challenges, helping users optimize their phone system’s performance without requiring advanced technical knowledge. For detailed support, users can also refer to NEC’s customer service resources.

NEC phone manuals serve as essential resources for optimizing communication systems, offering detailed guidance for models like SV9100, SV8100, and SL2100. They provide step-by-step instructions, troubleshooting solutions, and insights into advanced features, ensuring users maximize their phone system’s potential. Whether setting up, configuring, or maintaining NEC phones, these manuals are invaluable. By following the guidelines and tips provided, users can enhance productivity and efficiency. NEC continues to support its customers with comprehensive documentation, making it easier to navigate and utilize their systems effectively. For any queries or further assistance, additional resources like FAQs and interactive guides are readily available. These manuals are a testament to NEC’s commitment to delivering user-friendly and reliable communication solutions.

About

NEC Corporation is a global leader in telecommunications and information technology, renowned for its innovative communication solutions. The NEC Univerge series, including models like SV9100, SV8100, and SL2100, represents cutting-edge technology designed to meet diverse business needs. These user guides and manuals are crafted to empower users with clear, concise instructions, ensuring seamless operation and troubleshooting. By adhering to safety and compliance standards, NEC prioritizes user satisfaction and system reliability. This comprehensive documentation reflects NEC’s commitment to delivering high-quality products and supporting customers in optimizing their communication systems. Whether for setup, advanced features, or maintenance, NEC manuals are indispensable resources for users seeking to maximize their phone system’s potential.

rolls mx422 manual

Welcome to the Rolls MX422 manual. This professional ENG mixer is designed for audio engineers and videographers, featuring four XLR inputs with phantom power, low-cut filters, and a built-in limiter for optimal audio control.

1.1 Overview of the Rolls MX422

The Rolls MX422 is a professional ENG mixer designed for audio engineers and videographers. It features four XLR inputs with switchable 48V phantom power and 100Hz low-cut filters, ideal for reducing unwanted low-frequency noise. The mixer includes two balanced XLR outputs with a -30dB pad, ensuring flexible connectivity. Additionally, it offers a 1/4″ TRS stereo monitor input for real-time audio monitoring. The MX422 also incorporates a built-in limiter with variable threshold control to prevent audio distortion. This compact and durable mixer is tailored for field recording, broadcasting, and video production, providing high-quality audio performance in demanding environments.

1.2 Purpose of the Manual

This manual is designed to guide users in the proper use, setup, and maintenance of the Rolls MX422 Field Mixer. It provides detailed instructions for operating the mixer, including features like phantom power, low-cut filters, and the built-in limiter. The manual also covers troubleshooting common issues and offers tips for optimal performance. Intended for both experienced audio engineers and newcomers, this guide ensures safe and effective use of the MX422. By following the instructions, users can maximize the mixer’s capabilities while preventing damage. This manual is an essential resource for anyone looking to get the most out of their Rolls MX422.

1.3 Key Features of the Rolls MX422

The Rolls MX422 is a professional ENG mixer equipped with four XLR inputs, each offering switchable 48V phantom power and 100Hz low-cut filters. It features two balanced XLR outputs with a -30dB pad and a 1/4″ TRS stereo monitor input. The mixer includes a built-in limiter with variable threshold control, ensuring audio signals remain distortion-free. Its compact design makes it ideal for field use, while the intuitive control panel allows for easy adjustments. The MX422 supports both balanced and unbalanced connections, enhancing versatility. These features make it a reliable tool for audio engineers and videographers seeking high-quality sound in demanding environments.

Installation and Setup

Unpack and inspect the MX422, ensuring all components are included. Power the mixer using batteries or an external DC source. Connect external devices and refer to the quick start guide for initial setup.

2.1 Unpacking and Inspection

Begin by carefully unpacking the Rolls MX422 mixer and its accessories. Inspect the unit for any visible damage or defects. Ensure all components, including the Quick Start Guide, are included in the package. Verify the mixer’s serial number and check for any signs of tampering. Before powering on, examine the control panel and connections to ensure they are clean and free from debris. This step is crucial to ensure optimal performance and prevent potential issues during operation. If any damage is found, contact the manufacturer or supplier immediately for assistance. Proper inspection helps guarantee a smooth setup process.

2.2 Powering the MX422

To power the Rolls MX422, you can use either the internal battery or an external DC power source. Insert the battery into the mixer, ensuring it is securely connected. Alternatively, connect an external DC power supply, such as the Rolls PS27, to the DC Input connector. Press the POWER button to turn on the mixer. The battery life indicator will illuminate, showing the remaining power. If using an external power source, ensure it is set to 12V DC to avoid damage. Proper power setup is essential for reliable operation. Always verify power connections before use to prevent unexpected shutdowns during recording or live applications.

2.3 Connecting External Devices

The Rolls MX422 supports a variety of external connections to integrate seamlessly with your audio setup. Connect microphones or line-level sources to the four XLR inputs, ensuring secure connections for reliable signal transfer. For monitoring, use the 1/4″ TRS stereo monitor input to connect headphones or external speakers. Additionally, the auxiliary input allows for extra audio sources to be routed through the mixer. When connecting external devices, use high-quality cables to minimize noise and interference. Properly securing all connections ensures optimal performance and prevents signal loss during recording or live applications.

Control Panel Layout

The MX422 features an intuitive control panel with clear sections for inputs, outputs, monitoring, and additional controls, ensuring easy navigation and efficient operation during recording or live setups.

3.1 Input Section

The input section of the Rolls MX422 is designed for clarity and precision. It includes four XLR inputs with switchable 48V phantom power, ideal for connecting microphones. Each input features a trim control for adjusting signal levels, ensuring optimal audio capture. Additionally, each channel is equipped with a low-cut filter to reduce unwanted low-frequency noise. The input section also includes LED indicators for phantom power status, providing clear visual feedback. This setup allows users to easily manage multiple audio sources, making it suitable for both field recording and studio environments. The inputs are balanced, minimizing interference and ensuring high-quality audio reproduction.

3.2 Output Section

The output section of the Rolls MX422 is designed to provide flexible and high-quality audio distribution. It features two balanced XLR outputs with a -30dB pad, allowing seamless integration with professional audio equipment. Additionally, a 1/4″ TRS auxiliary output is available for monitoring or secondary audio routing. The outputs are optimized for low noise and distortion, ensuring crystal-clear audio reproduction. LED indicators on the output section provide visual feedback for signal presence. This setup makes the MX422 ideal for broadcast, film, and live sound applications, where reliable and adaptable audio outputs are essential. The outputs are designed to handle various professional scenarios with ease.

3.3 Monitoring Section

The monitoring section of the Rolls MX422 is equipped with a 1/4″ TRS stereo monitor input, enabling connection to an external monitor source. A dedicated monitor level control allows precise adjustment of the monitoring output, ensuring accurate audio reproduction. The section also features a metering system with LED indicators, providing clear visual feedback of audio levels. This setup allows engineers to monitor audio effectively, making adjustments as needed to maintain high-quality sound. The monitoring section is designed to be user-friendly, offering intuitive controls for real-time audio assessment and optimization. This feature is particularly useful in field recording and live sound environments.

3.4 Additional Controls

The Rolls MX422 features several additional controls that enhance its functionality. The phantom power switch enables 48V power for condenser microphones, while the low-cut filter reduces low-frequency noise. A variable limiter ensures audio signals remain distortion-free by automatically adjusting output levels. The mixer also includes a battery select switch for seamless power source transitions and a trim control for fine-tuning input levels. These controls provide precise audio management, catering to both studio and field recording needs. Their intuitive placement on the panel allows for quick adjustments, ensuring high-quality audio reproduction in various professional environments. These features make the MX422 versatile and user-friendly for audio engineers.

Detailed Features

The MX422 offers advanced features like switchable 48V phantom power, 100Hz low-cut filters, a built-in limiter, and both balanced XLR and unbalanced connections for professional audio applications.

4.1 Phantom Power

The Rolls MX422 is equipped with switchable 48V phantom power, enabling the use of condenser microphones. This feature is essential for professional audio applications, ensuring high-quality sound capture. Each input channel has an independent phantom power switch, allowing flexible control without affecting other channels. Phantom power is typically required for condenser microphones to operate correctly. The MX422’s implementation ensures stable and noise-free power supply, maintaining optimal audio performance. This feature is a testament to the mixer’s versatility and suitability for both studio and field recording environments.

4.2 Low-Cut Filters

The Rolls MX422 features a 100Hz low-cut filter, designed to reduce low-frequency noise such as hum, rumble, or ambient vibrations. This filter is applied to each input channel, providing precise control over unwanted low-end frequencies. By engaging the low-cut filter, users can ensure cleaner audio capture, especially in environments prone to background noise. This feature is particularly beneficial for field recordings, ENG applications, and videography, where maintaining audio clarity is crucial. The filter operates seamlessly with the mixer’s other functions, allowing for professional-grade sound quality in a variety of settings.

4.3 Limiter Function

The Rolls MX422 is equipped with a built-in limiter function, designed to prevent signal overload and distortion. The limiter automatically reduces the audio signal when it exceeds a set threshold, ensuring clean and professional sound quality. This feature is especially useful in high-pressure environments like live recordings or ENG applications, where sudden audio peaks can occur. The limiter operates seamlessly with the mixer’s other features, such as phantom power and low-cut filters, to provide consistent and reliable performance. By preventing distortion, the limiter helps maintain the integrity of the audio signal, making it an essential tool for professional audio engineers and videographers.

4.4 Balanced and Unbalanced Connections

The Rolls MX422 supports both balanced and unbalanced connections, offering flexibility for various audio setups. Balanced connections, via XLR inputs and outputs, minimize noise interference, ideal for professional environments. The mixer also accommodates unbalanced connections, such as the 1/4″ TRS monitor input, ensuring compatibility with consumer-grade equipment. The balanced XLR outputs include a -30dB pad, allowing seamless integration with devices requiring lower signal levels. This dual connection capability enhances versatility, making the MX422 suitable for ENG, field recording, and studio applications. By supporting both connection types, the MX422 ensures high-quality audio transmission across diverse settings and equipment configurations.

Connections

The Rolls MX422 offers versatile connectivity with four XLR inputs, balanced XLR outputs, a 1/4″ TRS monitor input, auxiliary input, and a DC power input for external power sources.

5.1 Input Connections

The Rolls MX422 features four XLR inputs, each capable of accepting microphone or line-level signals. Inputs are equipped with switchable 48V phantom power, enabling compatibility with condenser microphones. Additionally, each input includes a 100Hz low-cut filter to minimize unwanted low-frequency noise. The inputs are balanced, ensuring high-quality audio transmission with reduced interference. For flexibility, the mixer also supports external power sources, such as the Rolls PS27, via the DC input connector; Proper connection of these inputs is essential for achieving optimal audio performance in various professional settings.

5.2 Output Connections

The Rolls MX422 is equipped with two balanced XLR outputs, designed to provide high-quality audio transmission. These outputs feature a -30dB pad, allowing them to handle a wide range of audio levels without distortion. Additionally, the mixer includes a 1/4″ TRS stereo monitor input, enabling convenient monitoring of audio signals. The balanced outputs ensure minimal noise interference, making them ideal for professional applications such as broadcasting and videography. Properly connecting these outputs is crucial for maintaining audio integrity and achieving optimal performance in various professional settings.

5.3 Monitor Input

The MX422 features a 1/4″ TRS stereo monitor input, allowing users to connect an external audio source for monitoring purposes. This input is designed to provide a clear and accurate representation of the audio signal, enabling precise adjustments during recording or live sessions. The monitor input is independent of the main mix, giving engineers flexibility in their workflow. Proper connection of the monitor input ensures that audio can be reviewed and optimized effectively. This feature is particularly useful in field recording scenarios where real-time monitoring is essential for capturing high-quality audio.

5.4 Auxiliary Input

The MX422 includes an auxiliary input, providing flexibility for integrating additional audio sources into the mixing process. This feature allows users to connect external devices, such as playback systems or secondary audio equipment, directly to the mixer. The auxiliary input is designed to enhance workflow by enabling seamless integration of supplementary audio signals. It is particularly useful in scenarios where multiple audio sources need to be managed simultaneously. Proper use of the auxiliary input ensures that all connected devices operate in harmony, delivering a comprehensive and professional audio mixing experience. This feature is a testament to the mixer’s versatility in various audio production environments.

Operating the Mixer

Power on the MX422, adjust input levels, and engage the limiter as needed. Monitor audio through the stereo monitor input for precise control of your sound output.

6.1 Powering On the Mixer

To power on the Rolls MX422, connect it to a DC power source or insert batteries. Press the POWER button to activate the mixer. Ensure all connections are secure before use. The mixer will automatically stabilize and be ready for operation. Always verify power sources are compatible to avoid damage. For battery operation, press the POWER button to check battery life. Green indicates full charge, while red signals low battery. Proper power initialization ensures optimal performance. Follow these steps carefully for reliable operation in any professional setting.

6.2 Adjusting Input Levels

Adjusting input levels on the Rolls MX422 ensures optimal audio quality. Begin by connecting your microphone or line-level source to the corresponding XLR input. Use the trim control to set the input level, adjusting it until the LED meter indicates a peak level of -12dB to -6dB. For line-level sources, ensure the trim is set appropriately to avoid distortion. If using a microphone, enable phantom power if required. Monitor the audio signal through headphones or the monitor output to fine-tune the levels. Proper gain staging is essential to maintain a clean and distortion-free audio signal throughout the mixing process.

6.3 Using the Limiter

The Rolls MX422 features a built-in limiter to prevent audio distortion and maintain signal integrity. To use the limiter, first enable it via the control panel. Adjust the threshold control to set the maximum desired signal level, ensuring peaks do not exceed this point. Monitor the gain reduction meter to observe how much the signal is being limited. The ratio control allows you to determine the severity of limiting, with higher ratios providing more aggressive peak suppression. Properly setting the limiter ensures clean audio output, especially in dynamic environments, while preserving the integrity of your recordings.

6.4 Monitoring Audio

Monitoring audio on the Rolls MX422 is straightforward. Connect your monitoring headphones to the 1/4″ TRS stereo monitor input. Ensure the monitor source is selected, either from the main mix or a dedicated monitor mix. Adjust the monitor level control to a comfortable listening level. Use the high-quality headphone amplifier for accurate audio representation. Additionally, the MX422’s metering provides visual feedback of output levels, helping you maintain optimal audio balance. Proper monitoring ensures you can make precise adjustments, guaranteeing high-quality recordings and live mixes. Always test your monitoring setup before recording to ensure reliable audio reproduction.

Troubleshooting

Troubleshooting common issues with the Rolls MX422 ensures optimal performance. Consult the manual for solutions to power, connection, and audio quality problems, ensuring reliable operation.

7.1 Common Issues

Common issues with the Rolls MX422 include power malfunctions, connection problems, and audio quality inconsistencies. Power issues may arise from battery drain or faulty DC connections. Connection problems often involve improper XLR or TRS cable links, leading to no audio output. Audio quality issues, such as distortion or low volume, may result from incorrect gain staging or limiter misuse. These problems can typically be resolved by checking power sources, verifying cable connections, and adjusting input levels. Regular maintenance, such as cleaning controls and updating firmware, can prevent many of these issues. Refer to the manual for detailed troubleshooting steps.

7.2 Solving Connection Problems

Connection issues with the Rolls MX422 can often be resolved by checking cable integrity and proper input/output configurations. Ensure all XLR and TRS connections are secure and free from damage. For balanced connections, verify that XLR pins are correctly matched to prevent signal loss. If using unbalanced connections, ensure proper adapters are in place. Monitor input levels to avoid overloading outputs. If no audio is present, check the power source and ensure the mixer is powered on. For auxiliary inputs, confirm the correct TRS cable is used and levels are adjusted properly. Refer to the manual for detailed connection diagrams and troubleshooting guides.

7.3 Audio Quality Issues

If you encounter audio quality issues with the Rolls MX422, check for proper gain staging and ensure inputs are not overloading. Low volume may indicate incorrect trim settings or unbalanced connections. For hum or noise, verify cable quality and ensure balanced connections are used. Distortion could result from excessive input levels; adjust the limiter threshold to prevent clipping. If using phantom power, confirm it’s enabled only for microphones requiring it. Clean or replace dirty connectors to eliminate crackling sounds. For persistent issues, reset the mixer to factory settings or update the firmware if available. Always refer to the manual for detailed troubleshooting guides.

Maintenance

Regularly clean the mixer with a dry cloth and inspect connectors for wear. Update firmware for optimal performance and store the mixer in a protective case when not in use.

8.1 Cleaning the Mixer

Regular cleaning is essential to maintain the performance and longevity of the Rolls MX422 mixer. Use a soft, dry cloth to wipe down the exterior and control surfaces. For stubborn marks, a slightly damp cloth may be used, but ensure no moisture enters the device. Avoid harsh chemicals or abrasive cleaners, as they may damage the finish or harm electronic components. Periodically inspect and clean the input and output connectors with compressed air to remove dust and debris. Additionally, gently clean the faders and switches with a dry cloth to prevent dirt buildup. Proper cleaning ensures reliable operation and preserves the mixer’s appearance.

8.2 Updating Firmware

To ensure optimal performance, periodically update the Rolls MX422 firmware. Visit the official Rolls Corporation website to download the latest firmware version. Use a compatible USB drive to transfer the firmware file to the mixer. Power on the MX422 and navigate to the firmware update section in the settings menu. Follow the on-screen instructions to complete the update process. Do not disconnect power or interrupt the update, as this may cause system instability. Once the update is successful, restart the mixer to apply the changes. Regular firmware updates enhance functionality, fix issues, and ensure compatibility with emerging technologies. Always verify the firmware version matches your mixer model.

8.3 Storing the Mixer

Proper storage of the Rolls MX422 mixer is essential to maintain its performance and longevity. Store the mixer in a cool, dry environment, avoiding exposure to humidity and extreme temperatures. Before storage, clean the mixer with a soft cloth to prevent dust buildup. Use the original packaging or a sturdy, padded case to protect against physical damage. Power down the mixer and disconnect all cables and accessories. Remove any batteries to prevent corrosion. Label the storage container for easy identification. Periodically inspect the mixer during storage to ensure no damage occurs. Always handle the mixer with care to avoid shocks or drops, even when transporting it.

The Rolls MX422 manual provides essential guidance for optimal use, ensuring professional audio performance. Proper care and maintenance will extend its lifespan and reliability in demanding environments.

9.1 Summary of Key Points

The Rolls MX422 manual outlines a professional ENG mixer designed for audio engineers and videographers. It features four XLR inputs with switchable 48V phantom power, 100Hz low-cut filters, and a built-in limiter. The mixer includes balanced XLR outputs with a -30dB pad and a 1/4″ TRS stereo monitor input. Proper use requires knowledge of audio electronics and connections. Regular maintenance, such as cleaning and updating firmware, ensures longevity. By following the manual’s guidelines, users can optimize performance and troubleshoot common issues effectively. This summary highlights the essential aspects of the MX422, emphasizing its versatility and reliability in professional audio applications.

9.2 Final Tips for Optimal Use

For optimal performance, regularly clean the mixer to prevent dust buildup and ensure proper function. Always use the recommended battery or external power source to maintain stable operation. Adjust input levels carefully to avoid distortion and utilize the limiter to prevent audio overload. Enable low-cut filters to reduce unwanted low-frequency noise. Familiarize yourself with balanced and unbalanced connections to achieve the best audio quality. Store the mixer in a protective case when not in use to prevent damage. By following these tips and referring to the manual, you can maximize the MX422’s capabilities and ensure professional-grade audio results.

Additional Resources

For further assistance, visit the official Rolls website to download the manual, contact customer support, or explore community forums for troubleshooting and expert advice.

10.1 Downloading the Manual

The Rolls MX422 manual is available for free download on platforms like Manuals.ca and the official Rolls Corporation website. The manual is provided in PDF format, spanning six pages, and includes detailed instructions for the proper use and maintenance of the mixer. It covers topics such as unpacking, power options, and troubleshooting. Users can easily access the manual by visiting the official website or searching for “Rolls MX422 manual” on trusted online resources. Downloading the manual is highly recommended for optimal use and to ensure familiarity with all features and settings of the MX422 mixer.

10.2 Manufacturer Support

Rolls Corporation provides comprehensive support for the MX422 mixer. Users can contact the manufacturer directly through their official website or by phone at (801) 263-9053. The corporation, based in Salt Lake City, Utah, offers technical assistance, troubleshooting, and repair services. Additionally, the manufacturer provides firmware updates and maintenance tips to ensure optimal performance. For any inquiries or issues, customers can reach out to the support team, who are dedicated to addressing concerns promptly. Rolls Corporation’s commitment to customer service ensures that MX422 users receive the help they need to maximize their mixer’s potential and resolve any operational challenges effectively.

10.3 Online Communities

Online communities and forums are excellent resources for Rolls MX422 users to connect, share experiences, and troubleshoot issues. Platforms like Manuals.ca and specialized audio forums host discussions where users can ask questions, exchange tips, and access shared knowledge. These communities often include real-world insights, repair advice, and creative solutions from experienced professionals. Additionally, some forums provide access to downloadable PDF manuals and quick-start guides. Engaging with these communities can enhance your understanding of the MX422 and help you optimize its performance. Active participation in these groups ensures you stay updated on best practices and solutions from a diverse user base.

mitsubishi lancer manual

Welcome to the comprehensive guide for the Mitsubishi Lancer, designed to provide detailed insights and practical instructions for maintenance, repair, and optimization of your vehicle.

1.1 Overview of the Mitsubishi Lancer

The Mitsubishi Lancer is a versatile and reliable compact car introduced in 1973, known for its durability and performance. Available in sedan, wagon, and Sportback models, it offers practicality and style. Renowned for its fuel efficiency and robust engineering, the Lancer has become a popular choice worldwide, supported by extensive service manuals and repair resources.

1.2 Importance of the Service Manual

The Mitsubishi Lancer service manual is essential for proper maintenance, repairs, and understanding vehicle specifications. It provides detailed instructions, torque settings, and troubleshooting guides, ensuring safety and efficiency. Whether for DIY projects or professional servicing, the manual is a vital resource to keep your Lancer in optimal condition and extend its lifespan.

General Maintenance Guidelines

Regular maintenance is crucial for optimal performance. Follow scheduled checks, oil changes, and tire pressure guidelines to ensure longevity and reliability of your Mitsubishi Lancer.

2.1 Scheduled Maintenance Intervals

Scheduled maintenance intervals ensure your Mitsubishi Lancer operates efficiently. Follow the recommended service intervals for oil changes, tire rotations, and inspections to maintain performance and prevent potential issues. Regular checks every 5,000 to 15,000 miles are essential for prolonging the vehicle’s lifespan and ensuring reliability on the road.

2.2 Oil Change and Lubrication

Regular oil changes are crucial for your Mitsubishi Lancer’s performance and longevity. Ensure the vehicle is on a level surface, warm the engine, and turn it off. Disconnect the negative battery terminal to prevent any electrical issues. Drain the old oil, replace the oil filter, and refill with the correct oil type as specified in the manual. Proper lubrication ensures smooth engine operation and prevents premature wear. Always dispose of used oil responsibly.

2.3 Tire Pressure and Rotation

Maintaining correct tire pressure and regular rotation ensures optimal performance, safety, and longevity. Check pressure monthly, using the recommended specifications in your manual. Underinflated tires reduce fuel efficiency and increase wear. Rotate tires every 5,000 to 8,000 miles to ensure even tread wear. Use a lug wrench for rotation and consult a professional if unsure.

Engine Service and Repair

This section provides detailed procedures for engine maintenance, troubleshooting, and repair. It covers disassembly, inspection, and reassembly, with torque settings and specifications for optimal performance and longevity.

3.1 Engine Overview and Specifications

The Mitsubishi Lancer features various engine options, including inline-four cylinders with capacities ranging from 1.5L to 2.4L. Notable models include the 4G9 series, known for reliability and efficiency. Specifications vary by model year, with details on horsepower, torque, fuel systems, and emissions standards provided in the manual for precise servicing and optimal performance.

3.2 Common Engine Issues and Solutions

Common engine issues in Mitsubishi Lancer include oil leaks, worn timing belts, and faulty oxygen sensors. Solutions involve replacing seals, belts, and sensors as needed. Regular maintenance, such as oil changes and inspections, helps prevent these problems, ensuring optimal engine performance and longevity.

3.3 Torque Settings and Bolt Tightening

Proper torque settings and bolt tightening are crucial for engine integrity. Head bolts typically require 60-70 Nm, while main bearing bolts need 40-50 Nm. Ensure all bolts are tightened in the correct sequence to prevent engine damage. Always consult the manual for specific torque values to maintain optimal performance and avoid leaks or component failure.

Transmission Service and Repair

This section covers essential procedures for servicing and repairing both manual and automatic transmissions, including fluid replacement, inspection, and troubleshooting common issues to ensure smooth operation.

4.1 Manual vs. Automatic Transmission

Understanding the differences between manual and automatic transmissions is crucial for proper maintenance. Manuals require clutch replacements and gear oil changes, while automatics need fluid replacements and filter cleaning. Both systems demand regular checks to ensure optimal performance and longevity of your Mitsubishi Lancer’s drivetrain.

4.2 Transmission Fluid Replacement

Regular transmission fluid replacement is essential for maintaining smooth gear operation and preventing overheating. For Mitsubishi Lancer, replace the fluid every 30,000 to 60,000 miles, depending on driving conditions. Use the manufacturer-recommended fluid type to ensure optimal performance. Always drain the old fluid, replace the filter, and refill with fresh fluid to maintain transmission health and longevity.

4.3 Troubleshooting Transmission Problems

Identify transmission issues by checking for symptoms like slipping gears, delayed engagement, or unusual noises. Inspect fluid levels and condition, and replace filters as needed. Use diagnostic tools like M.U.T.-II/III to scan for fault codes. Address problems promptly to prevent further damage, and consult a professional if issues persist or require advanced repair.

Brake System Maintenance

Identify transmission issues by checking for symptoms like slipping gears, delayed engagement, or unusual noises. Inspect fluid levels and condition, and replace filters as needed. Use diagnostic tools like M.U.T.-II/III to scan for fault codes. Address problems promptly to prevent further damage, and consult a professional if issues persist or require advanced repair.

5.1 Brake Pad Replacement

Replace brake pads when worn below 1/8 inch. Inspect rotors for damage. Loosen caliper bolts, remove old pads, and install new ones. Tighten calipers securely. Bleed brakes if necessary. Always refer to the manual for specific torque settings. Ensure proper alignment to avoid uneven wear. Test brakes safely after replacement.

5.2 Brake Fluid Replacement

Replace brake fluid every 30,000 miles or as per manual. Use DOT 3 or DOT 4. Loosen reservoir cap, drain old fluid using a turkey baster or syphon, flush system, refill. Avoid air bubbles. Tighten cap, check for leaks, test brakes. Dispose old fluid responsibly for environmental safety.

5.3 ABS System Troubleshooting

Identify ABS issues by checking warning lights or fault codes. Inspect wheel speed sensors, wiring, and ABS pump for damage. Use diagnostic tools like MUT-III to read codes. Replace faulty components and bleed brakes if needed. Consult the service manual for specific procedures to ensure system functionality and safety. Regular checks prevent malfunctions.

Electrical System Overview

The Mitsubishi Lancer’s electrical system includes the battery, alternator, wiring, and ECU. Proper functioning ensures reliable operation of lights, infotainment, and safety systems like ABS and airbags.

6.1 Battery Maintenance

Proper battery maintenance is crucial for the Mitsubishi Lancer’s electrical system. Regularly check terminals for corrosion, ensure secure connections, and monitor charge levels. Replace the battery every 5-7 years or when capacity drops below 75%. Use a compatible replacement and follow safety guidelines to avoid electrical issues or system malfunctions.

6.2 Wiring Diagrams

Wiring diagrams are essential for diagnosing and repairing electrical issues in your Mitsubishi Lancer. These detailed schematics are included in the service manual, covering systems like the engine, transmission, and brakes. They provide a clear visual guide for troubleshooting and ensure accurate repairs. Access them online or download as PDFs for convenient use.

6.3 Common Electrical Issues

Common electrical issues in the Mitsubishi Lancer include faulty sensors, wiring harness corrosion, and battery drain. These problems often result in dashboard warning lights or system malfunctions. Additionally, issues like ECU glitches and alternator failures can occur. Regular inspection of connectors and wiring, along with proper diagnostic tools, is essential for resolving these issues efficiently.

Special Tools and Equipment

Specialized tools like M.U.T.-III diagnostic equipment and torque wrenches are essential for precise repairs. These tools ensure accuracy and efficiency in servicing your Mitsubishi Lancer effectively.

7.1 Mitsubishi Special Tools

Mitsubishi special tools, including M.U.T.-II/III diagnostic systems, are crucial for precise diagnostics and repairs. These tools enable technicians to access advanced vehicle systems, ensuring accurate troubleshooting and efficient servicing of your Lancer. Regular updates keep them compatible with the latest models and technologies, maintaining optimal performance and reliability.

7.2 Diagnostic Tools (M.U.T.-II/III)

The M.U.T.-II/III diagnostic tools are essential for Mitsubishi Lancer maintenance, offering advanced fault detection and real-time data monitoring. These tools facilitate efficient troubleshooting by accessing the vehicle’s computer systems, ensuring accurate diagnoses and repairs. Regular software updates enhance their functionality, keeping them aligned with the latest vehicle technologies and service requirements.

7.3 Safety Precautions

Always follow safety guidelines when working on your Mitsubishi Lancer. Disconnect the negative battery terminal before starting repairs. Ensure the ignition switch and all lamps are turned off. Use proper tools and protective gear to avoid injuries. Refer to the manual for specific precautions to prevent damage to the vehicle or harm to yourself.

Model-Specific Information

This section provides detailed information tailored to specific Mitsubishi Lancer models, ensuring accurate guidance for unique features, specifications, and requirements of each variant.

8.1 Mitsubishi Lancer Evolution Models

The Mitsubishi Lancer Evolution models are high-performance variants, known for their advanced turbocharged engines and rally-inspired design. Technical manuals for these models provide detailed specifications, special tool requirements, and diagnostic procedures, ensuring optimal performance and maintenance tailored to their unique capabilities.

8.2 Mitsubishi Lancer Wagon

The Mitsubishi Lancer Wagon offers a practical blend of versatility and performance, ideal for family use. Maintenance tips include cargo area protection and suspension checks. Service manuals provide detailed guidelines for model-specific adjustments, ensuring optimal functionality and longevity. PDF downloads and official Mitsubishi resources are recommended for precise servicing.

  • Focus on cargo space optimization.
  • Ensure proper suspension maintenance.
  • Consult model-specific repair guides.
  • 8.3 Mitsubishi Lancer Sportback

    The Mitsubishi Lancer Sportback combines sleek design with dynamic performance, offering a sporty alternative to the traditional sedan. Maintenance focuses on preserving its aerodynamic features and handling. Service manuals highlight model-specific adjustments for optimal performance. DIY guides and PDF resources provide detailed instructions for repairs and upgrades tailored to the Sportback variant.

    • Emphasizes sporty design and agility.
    • Focus on aerodynamic maintenance.
    • Model-specific repair recommendations.
    • Troubleshooting Guide

      A comprehensive guide for identifying and resolving common issues in your Mitsubishi Lancer. Covers fault codes, diagnostic procedures, and resetting the service indicator for optimal performance.

      9.1 Common Fault Codes

      Explore the most frequent fault codes encountered in Mitsubishi Lancer models, such as engine misfires, oxygen sensor issues, and ABS system warnings. This section provides a detailed explanation of each code, helping you diagnose and address problems efficiently with the right tools and knowledge.

      9.2 Diagnostic Procedures

      Learn step-by-step diagnostic procedures for identifying issues in your Mitsubishi Lancer. From connecting diagnostic tools like M.U.T.-II/III to scanning fault codes, this section guides you through troubleshooting processes. Disconnect the negative battery terminal, use a tachometer, and follow detailed instructions to pinpoint problems accurately and efficiently, ensuring proper system resets post-repair.

      9.3 Resetting the Service Indicator

      Resetting the service indicator ensures your Mitsubishi Lancer’s maintenance system operates accurately. Turn off all lamps and the ignition, then disconnect the negative battery terminal. Use diagnostic tools like M.U.T.-II/III to clear service lights. Follow the manual’s step-by-step guide to complete the reset, ensuring proper system functionality and maintaining your vehicle’s health.

      Availability of Service Manuals

      Service manuals for the Mitsubishi Lancer are easily available online in PDF format, including the 2007 MY service manual as a zip archive from GitHub and other sources.

      10.1 Online Resources

      Online resources offer convenient access to Mitsubishi Lancer manuals. Platforms like GitHub, forums, and official Mitsubishi websites provide PDF downloads, including the 2007 MY service manual and 2003 Workshop Manual. These resources are available as single files or zip archives, covering maintenance, repairs, and troubleshooting. Supplementary manuals and technical bulletins are also accessible for comprehensive support.

      10.2 PDF Downloads

      PDF downloads are a popular choice for accessing Mitsubishi Lancer manuals. Available on platforms like GitHub and forums, these PDFs include detailed service and repair guides, such as the 2003 Workshop Manual and 2007 MY service manual. They cover essential topics like engine repair, transmission service, and troubleshooting, offering a user-friendly format for easy reference and offline use.

      10.4 Offline Archive Versions

      Offline archive versions of the Mitsubishi Lancer manual are available for download, offering comprehensive coverage of maintenance, repair, and servicing. These zip archives, such as the 95.8 MB and 203 MB files, provide detailed instructions, diagrams, and specifications. They are ideal for mechanics and DIY enthusiasts needing offline access to critical information, ensuring uninterrupted work on vehicle repairs and upgrades.

      DIY Repair Guides

      This section provides detailed DIY guides for Mitsubishi Lancer repairs, including step-by-step instructions, torque settings, and troubleshooting tips, empowering owners to perform maintenance and fixes confidently.

      11.1 Step-by-Step Repair Instructions

      These guides offer detailed, easy-to-follow instructions for common repairs, such as oil changes, brake replacements, and belt installations, ensuring owners can tackle maintenance with confidence and precision, using the Mitsubishi Lancer manual as their trusted resource.

      11.2 Video Tutorials

      Video tutorials provide visual guidance for Mitsubishi Lancer repairs, covering procedures like oil changes, belt replacements, and troubleshooting. Platforms like YouTube and forums offer step-by-step clips, helping owners perform tasks confidently with clear demonstrations and expert tips.

      11.3 Community Forums and Support

      Active forums and communities dedicated to the Mitsubishi Lancer offer invaluable support, sharing repair experiences, troubleshooting tips, and DIY guides. Members exchange advice, discuss common issues, and provide solutions, fostering a collaborative environment for owners to maintain and enhance their vehicles effectively.

      The Mitsubishi Lancer manual serves as an essential resource for owners, ensuring proper maintenance and repair. Regular servicing and adherence to guidelines will extend your vehicle’s lifespan and performance.

      12.1 Final Tips for Maintaining Your Mitsubishi Lancer

      Adhere to the service manual’s guidelines for scheduled maintenance, oil changes, and tire rotations. Use genuine parts to ensure reliability. Follow torque settings and refer to the manual for troubleshooting common issues. Regular servicing and proper care will extend your Mitsubishi Lancer’s lifespan and keep it performing at its peak.

      12.2 Importance of Regular Servicing

      Regular servicing is essential for maintaining your Mitsubishi Lancer’s performance, safety, and longevity. It helps prevent costly repairs by identifying potential issues early; Adhering to the manual’s guidelines ensures optimal engine efficiency, reliable braking, and smooth transmission operation, safeguarding your vehicle’s health and enhancing driving comfort.

      Additional Resources

      Explore supplementary manuals, technical bulletins, and online forums for enhanced DIY repairs and troubleshooting. Access Mitsubishi Lancer parts manuals, PDF downloads, and community support for detailed guidance.

      13.1 Mitsubishi Lancer Parts Manual

      The Mitsubishi Lancer Parts Manual offers detailed catalogs and diagrams for every component, ensuring accurate identification and ordering of genuine parts. Available online or as PDF downloads, these resources are essential for DIY repairs and professional servicing, covering all models from 1996 to 2007 and beyond.

      13.2 Supplementary Manuals

      Supplementary manuals provide additional insights and detailed instructions for specific repairs, diagnostics, and customizations. Available online or through forums, these resources complement the main manual, offering in-depth guides for enthusiasts and professionals. They cover advanced topics, troubleshooting, and model-specific modifications, ensuring comprehensive support for Mitsubishi Lancer owners seeking specialized knowledge.

      13.3 Technical Bulletins

      Technical bulletins are official documents issued by Mitsubishi, providing updates and notifications on vehicle maintenance. They address common issues, offer diagnostic tips, and detail part updates. Accessible via Mitsubishi’s website, forums, and repair shops, these bulletins assist owners and technicians in resolving problems efficiently, ensuring optimal performance and compliance with manufacturer standards.